For a £10k commercial, the choice between Arri and RED isn’t about image quality—it’s about financial risk management.
- Arri’s « perception premium » can impress clients, but its true value lies in workflow efficiency and reliable colour science that reduce post-production costs.
- Hidden expenses from non-standard accessories, insurance deductibles, and time lost to on-set checks can quickly derail a tight budget.
Recommendation: Prioritise the system with the lowest « Total Cost of Rental » (TCR), including standardised lenses and a robust insurance waiver, over the camera with the highest resolution.
As a producer staring at a £10,000 budget for a commercial, the camera choice feels monumental. The debate often boils down to a familiar refrain: RED for its high resolution, Arri for its legendary colour science. Clients might have a preference, the Director of Photography (DP) certainly will, but your job is to look at the balance sheet. The decision isn’t just creative; it’s a critical point of budget defence. Spending a significant chunk of your funds on the camera body is only the beginning of the story.
The common wisdom suggests you simply pick the « best » camera for the job. But what does « best » mean when every pound counts? It means the camera system that introduces the least amount of financial friction and risk into your production. The real cost of a camera isn’t its daily hire rate; it’s the ecosystem of expenses and potential pitfalls that surrounds it. From the price of compatible accessories to the hidden clauses in an insurance policy, every decision has a knock-on effect on your bottom line.
This guide moves beyond the technical specifications. Instead, we’ll adopt the pragmatic mindset of a line producer. We will analyse the choice between premium camera systems like Arri and RED not as a creative tug-of-war, but as a strategic exercise in risk management. The truly « justified » cost is the one that delivers a high-quality image while actively protecting your budget from the hidden expenses that can turn a profitable shoot into a financial nightmare.
To navigate this complex decision, this article breaks down the key financial and logistical pressure points every producer must consider. From client perception to the real cost of ‘cheap’ lenses, we will explore the factors that truly determine the value of your camera package.
Summary: Arri Alexa or Red Komodo: Navigating the Cost for a £10k Commercial
- Why Do Clients Take You More Seriously When You Show Up with an Arri?
- How to Test a Cinema Camera Sensor for Dead Pixels at the Rental House?
- Sony FX6 vs Canon C300 III: Which System Has Cheaper Accessories to Rent?
- The Insurance Gap That Leaves You Liable for £50,000 of Damaged Gear
- When to Pick Up Gear to Avoid Paying for an Extra Day?
- Why Skipping Professional Storyboarding Costs You £2,000 per Shooting Day?
- Why Cheap Lenses Make High-Tech Products Look Like Toys?
- Why Choosing ‘Cinema Quality’ Lenses Matters for Industrial Corporate Videos?
Why Do Clients Take You More Seriously When You Show Up with an Arri?
Let’s be blunt: perception matters. Arriving on set with an Arri camera sends an immediate signal to the client. It’s not just a piece of equipment; it’s a statement of intent and quality. In the world of high-end commercials, Arri is the established benchmark. This « perception premium » can foster client confidence, making them feel their investment is in the hands of serious professionals. It speaks to a certain level of production value before a single frame has been shot. Filmmakers often rent these high-end cameras specifically for this reason, leveraging the brand’s reputation to reinforce their own.
However, this prestige comes at a direct cost. Looking at the London rental market, you can expect to pay a premium. While rates vary, a basic Arri Alexa Mini package starts in a different league to many competitors. According to current rental market data, you can expect to see prices of $500–$1,500+ per day for Arri Alexa Mini packages, and that’s often before lenses and essential accessories. For a producer on a £10k budget, this initial outlay is significant and must be justified by more than just appearances.
The real justification lies in what Arri delivers beyond perception: reliability and a streamlined post-production workflow. ARRI is renowned for its color science and skin tone reproduction, often providing a more organic, pleasing look straight out of the camera. This can translate into considerable savings in the colour grade, reducing the time and money spent trying to « fix » problematic footage. So, while the client is impressed by the badge, the producer should be focused on the reduced post-production bill.
How to Test a Cinema Camera Sensor for Dead Pixels at the Rental House?
Here is a piece of advice that could save your budget: never, ever leave a rental house without checking the camera’s sensor for dead or stuck pixels. It’s a classic example of « workflow friction »—a small, overlooked step that can create catastrophic downstream costs. A single dead pixel on a crucial shot can mean hours of painstaking work in post-production. As post-production quality control experts note, VFX paint fixes at £100/hr can rapidly escalate, potentially costing more than the entire camera rental itself.
The process of checking is simple and non-negotiable. It’s your responsibility, not the rental house’s, to ensure the gear is fit for purpose before you accept it. This 15-minute check is one of the highest-leverage actions you can take to mitigate risk. The image below shows the microscopic grid you are inspecting; a single faulty photosite can become a glaring issue on a 4K monitor.
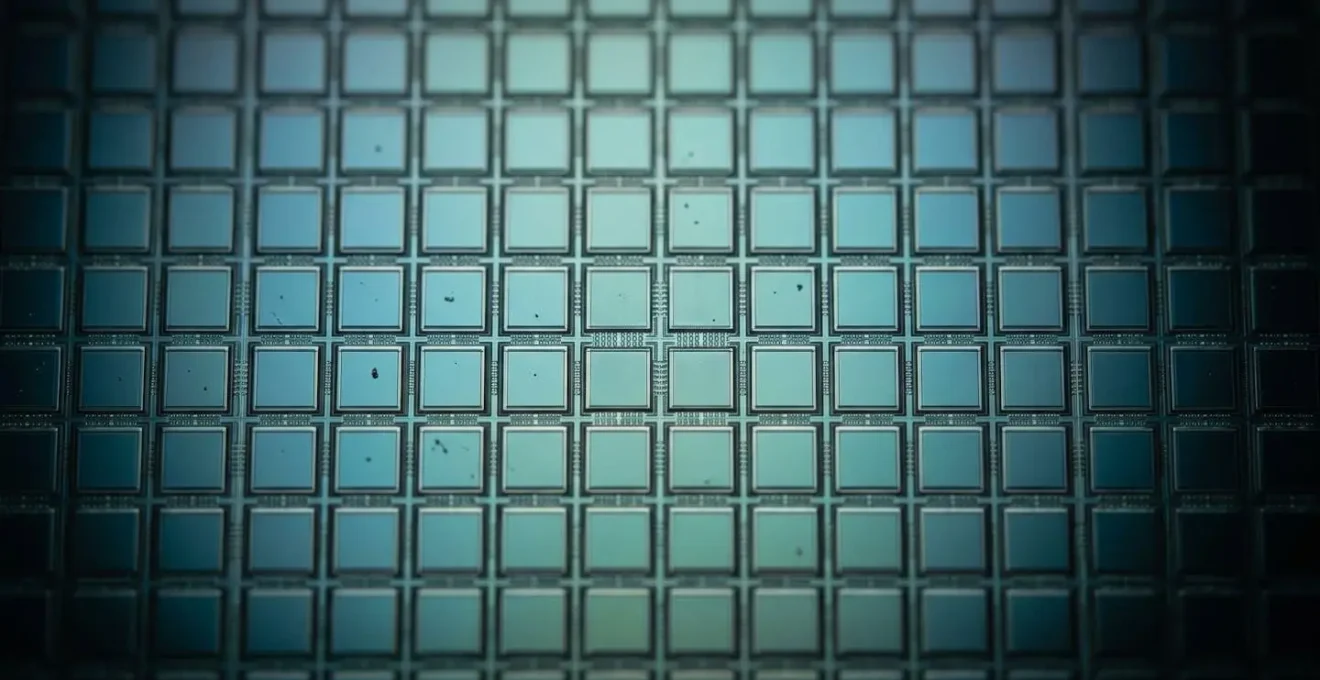
As the schematic view demonstrates, a sensor is a complex component where errors can and do occur. A stuck pixel (always on) or dead pixel (always off) might be invisible on the camera’s small monitor but become a major headache in the edit suite. Don’t assume a high-end camera like an Arri or RED is immune. They are workhorses, and pixels can fail. Your diligence during prep is the only firewall against this unnecessary expense.
Your Action Plan: Dead Pixel Testing Protocol
- Controlled Environment: Set the camera to its base ISO in manual mode with the lens cap on and the viewfinder closed.
- Hot Pixel Check: Shoot several dark frames at various shutter speeds, starting with a 1/8 second exposure to identify any « hot » pixels that appear as bright dots.
- Stuck Pixel Check: Remove the lens cap and point the camera at an evenly illuminated, neutral surface (like a white wall). Shoot frames at different aperture settings to check for pixels that remain black.
- Consistency Check: Review the footage on a large, high-quality monitor. Check for pixel errors that appear consistently in the same location across multiple shots.
- Documentation: If you find any, document their location with a frame grab and immediately inform the rental house. They should provide a replacement body or a report acknowledging the issue.
Sony FX6 vs Canon C300 III: Which System Has Cheaper Accessories to Rent?
While the Arri vs. RED debate often dominates conversations about high-end production, a pragmatic producer must also consider the incredibly capable and budget-friendly alternatives. For many corporate, documentary, or online commercials, cameras like the Sony FX6 or Canon C300 Mark III offer a fantastic balance of quality and cost-effectiveness. The key advantage here is the concept of « Total Cost of Rental » (TCR). The camera body is just one line item; the real cost is the full, shoot-ready package.
This is where the Sony and Canon ecosystems shine. Their popularity means there is a vast and competitive rental market for accessories. Lenses with a native Sony E-mount or Canon RF/EF mount are often more widely available and cheaper to hire than the PL-mount cinema lenses required for an Arri or high-end RED. Media is another factor; the cost of CFexpress or SD cards for a Sony FX6 is significantly lower than renting a stack of Mini-Mags for a RED Komodo. These seemingly small savings add up quickly on a tight budget.
The challenge in filmmaking is often the sheer cost of production, and filmmakers must rely on rentals to access the right gear for each project. Choosing a system with a more affordable and flexible accessory path is a powerful budgeting strategy. The table below illustrates the typical daily rental costs you might encounter in the London market, highlighting how body-only prices can be misleading compared to the cost of a full package.
| Camera System | Body Only | Full Package | Key Features |
|---|---|---|---|
| Sony FX6 | £80-£120/day | £200-£400/day | Full-frame, excellent low-light, E-mount flexibility |
| Sony FX3 | £60-£100/day | £150-£300/day | Compact cinema camera, used on The Creator (2023) |
| Canon C300 III | £150-£250/day | £400-£600/day | Super 35, Canon color science, RF mount ecosystem |
The Insurance Gap That Leaves You Liable for £50,000 of Damaged Gear
Hiring a £50,000 camera package brings a significant financial risk that many producers underestimate: the insurance gap. Simply having « production insurance » is not enough. Most policies come with a hefty excess or deductible, often the first £1,000 to £2,500 of any claim, which you are personally liable for. Furthermore, many rental houses require a substantial deposit as security, and as ShareGrid’s rental guide points out, traditional deposits can tie up $20,000 (£15,000+) on a credit card for days, creating a major cash flow problem for a small production.
A more insidious risk lies in the policy’s fine print. A common exclusion is « mysterious disappearance, » meaning if gear vanishes without evidence of forced entry (e.g., from an unlocked car), it may not be covered. Another critical detail is the per-item limit. A £50k policy might sound comprehensive, but it could have a single-item limit of just £10k, leaving you massively exposed if an expensive cinema lens is damaged. Understanding these nuances is not logistical admin; it is fundamental risk management.
The solution is to scrutinise the insurance options offered. Most reputable rental houses offer a damage waiver. This is an additional fee, typically a percentage of the rental cost, that either reduces or completely eliminates your excess liability. On a £10k shoot, paying an extra £100-£200 for a waiver that covers a potential £2,500 liability is one of the smartest financial decisions a producer can make. Always compare the cost and coverage of the rental house waiver against your own annual policy. For short-term shoots, the waiver is often the most cost-effective and comprehensive protection.
When to Pick Up Gear to Avoid Paying for an Extra Day?
A savvy producer knows that the rental period is a negotiable and strategic part of budgeting. The clock starts ticking the moment you pick up the gear, and a poorly timed pickup can easily cost you an entire extra day’s hire fee across a whole package. Most rental houses in London operate on a 24-hour cycle. If you pick up gear at 10 AM on a Tuesday for a one-day shoot, it’s typically due back by 10 AM on Wednesday. Returning it at noon could trigger another full day’s charge.
The key is to plan your prep and travel time strategically. The industry standard is often a « check and collect » in the afternoon before the shoot day (e.g., after 3 PM) with a return in the morning after the shoot (e.g., before 10 AM). This gives your camera department time to prep the gear without eating into the first shoot day, all while staying within a single rental day’s billing. Always confirm this with the rental house in advance; last-minute assumptions are dangerous. Popular gear can get booked up, especially around weekends, so reserving well in advance gives you the leverage to define these timings.
For longer shoots, you can achieve even greater savings. Don’t think in daily rates; ask about the weekly rate. A common industry practice is that a « week » is billed as 3 or 4 days. As confirmed by rental house pricing structures, weekly rates are often 3-5 times the daily rate, which can save you 40% or more per day over a five-day shoot week. For shoots extending over several weeks, monthly discounts can offer even more substantial savings. Proactive communication with the rental company about your schedule can unlock these efficiencies and stretch your £10k budget much further.
Why Skipping Professional Storyboarding Costs You £2,000 per Shooting Day?
It can be tempting on a £10k budget to see pre-production services like professional storyboarding as a luxury you can’t afford. This is a false economy and one of the most common mistakes a producer can make. A shooting day with a full crew, location, and equipment can easily cost £2,000-£5,000 or more. The single biggest cause of budget overruns on set is not equipment failure; it’s indecision. When the director, DP, and agency are debating a shot on the day, the clock is ticking, and you are burning money.
A professional storyboard is not just a series of pretty pictures; it is a blueprint for efficiency. It forces the key creatives to make decisions *before* they arrive on the costly set. It aligns the entire crew on the visual language, framing, and sequence of shots. This clarity allows the gaffer to pre-light, the grip to prepare the next setup, and the 1st AD to schedule the day with precision. Without it, you are essentially paying a dozen people to watch a creative meeting happen in real-time.

The image above represents what should be happening weeks before the shoot, not on the day. Every card laid out is a question answered, a decision made, and a risk mitigated. A £500 investment in a storyboard artist can easily save you an hour of on-set confusion, which on a £2,000 day is a saving of £250. If it prevents two hours of delays, it’s paid for itself. Your equipment rental strategy should be a direct input to your production’s bottom line, not a logistical afterthought. Matching the rental house to the production tier is crucial; for a £10k commercial, a flexible independent rental house is often a better fit than a large studio-focused one.
Why Cheap Lenses Make High-Tech Products Look Like Toys?
You’ve stretched the budget to get a fantastic camera sensor, whether it’s an Arri Alexa or a RED Komodo. Now, the temptation is to save money on the glass in front of it. This is a critical error. Pairing a world-class sensor with cheap, poor-quality lenses is like putting budget tyres on a Formula 1 car. You completely negate the primary investment. For corporate videos featuring high-tech products—sleek electronics, precision-engineered components, or luxury goods—the lens is what translates that quality to the screen.
Cheap stills lenses or low-end cine-style lenses often suffer from a number of issues. They can have poor contrast (making blacks look milky grey), significant distortion (making clean lines look curved), and chromatic aberration (ugly purple or green fringing on high-contrast edges). They breathe heavily when focusing, meaning the frame appears to zoom in and out, a tell-tale sign of amateur production. Most importantly, they lack the sharpness and micro-contrast needed to resolve the fine textures and details that make a product feel premium and tangible. Your client’s £1 million machine ends up looking like a plastic toy.
This is where the philosophy behind a brand like Arri becomes instructive. As the Videomaker editorial team notes, the focus is on the complete image, not just one metric:
ARRI cameras usually max out at lower resolutions than RED, often around 3.2K or 4K, but the brand focuses on the overall texture and feel of the image rather than just resolution.
– Videomaker Editorial Team, Videomaker – RED vs. ARRI Camera Comparison
This « texture and feel » is delivered by the lens. An Arri sensor excels in handling shadows and retaining detail in highlights, but it needs a quality lens to provide that information in the first place. A good cinema lens delivers a clean, sharp, and flattering image that respects the product’s design and makes it feel valuable.
Key Takeaways
- Client perception of brands like Arri matters, but its real value is in workflow efficiency and reliable colour science that save money in post-production.
- Always perform a dead pixel check at the rental house; this 15-minute test can save you thousands of pounds in VFX fixes down the line.
- Standardised cinema lenses are not a luxury; their efficiency in swaps and consistent performance saves hours on set, directly protecting your budget.
Why Choosing ‘Cinema Quality’ Lenses Matters for Industrial Corporate Videos?
For a producer managing a tight budget, the term « cinema quality » can sound like an expensive upsell. But when it comes to lenses for industrial or corporate videos, it’s not about chasing a Hollywood aesthetic; it’s about on-set efficiency, which translates directly into cost savings. The defining characteristic of a true cinema lens set is not just optical quality, but standardisation. Every lens in the set, from a wide 24mm to a tighter 85mm, has the same physical dimensions, the same front diameter, and focus/iris gears in the exact same position.
This standardisation is the enemy of « workflow friction. » When the DP needs to swap from a wide shot to a close-up, it’s a lightning-fast process. There’s no need to move the matte box, re-position the follow focus motor, or add step-up rings. The swap takes seconds, not minutes. This might seem trivial, but the cumulative effect is enormous. A professional workflow analysis shows that with 30-second lens swaps vs 5 minutes, you can save an hour over 10-15 daily changes. On a £2,000 shoot day, that’s £250 of crew time saved right there.
Furthermore, cinema lenses are built as tools for professionals. They are robust, reliable, and integrate seamlessly with other professional equipment. Features like the ARRI Lens Data System (LDS) provide frame-accurate metadata about focus, iris, and zoom settings directly to the camera file. This information is invaluable for the VFX team in post-production, saving them hours of guesswork and tracking, which again, saves you money. This level of integration and efficiency is what you are paying for—not just a name, but a system designed to make the entire production pipeline faster and more reliable.
To protect your next £10k budget, shift your focus from debating camera specs to conducting a full risk assessment of your entire rental package. Analyse the Total Cost of Rental, demand workflow efficiency, and invest in the tools that save you time on set and in post.