The secret to a London-proof lighting kit isn’t just the gear you buy, but the agile, friction-free system you build around it.
- Focus on compact, battery-powered LED soft panels for rapid deployment and minimal weight.
- Mastering logistics, like efficient packing and smart rental house strategies, is as crucial as the lights themselves.
- A « Zero-Drag » mindset prioritises mobility and speed, saving you time, money, and stress on urban shoots.
Recommendation: Prioritise a complete system that minimizes setup time and carry weight over chasing raw power. Your back and your schedule will thank you.
The familiar London drizzle begins as your Uber pulls up. You have a corporate interview in a Canary Wharf high-rise, and every second counts. For the solo, run-and-gun filmmaker, the real challenge isn’t just getting the shot; it’s navigating the city with gear that is both powerful and portable. The journey—marked by tube station stairs, narrow lifts, and impatient drivers—is part of the job. Standard advice often points towards bulky three-point lighting kits and large softboxes, solutions that are impractical for a single operator moving through a dense urban landscape.
This approach ignores the critical « friction points » of the solo shooter: weight, setup speed, and logistical complexity. The constant battle with heavy bags, tangled cables, and gear that takes too long to assemble is a drain on your most valuable resource: creative energy. What if the solution wasn’t just a different piece of equipment, but a different philosophy entirely? This guide is built on the concept of Zero-Drag Filmmaking—an approach where every gear choice and workflow decision is optimised to eliminate friction and maximise agility.
Instead of just listing products, we will deconstruct the entire system a solo shooter needs in London. We’ll explore why classic principles still matter, how to choose between light types for maximum versatility, and the crucial logistical hacks that professionals use to stay nimble. This is about building a lighting kit that works with you, not against you, from the moment you leave your flat to the final pack-down.
To navigate this comprehensive guide, we’ve broken down the core components of the Zero-Drag system into distinct sections. This structure will take you from foundational lighting theory to advanced logistical and on-set techniques.
Summary: The Agile Videographer’s Lighting System for London
- Why the Classic 3-Point Setup Still Works for 90% of Corporate Interviews?
- How to Pack Lights for Flights Without Breaking Bulbs or Stands?
- Fresnel Kit or Soft Panels: Which is More Versatile for Documentaries?
- The Ventilation Mistake That Shuts Down Lights During Long Interviews
- How to Set Up a Professional Interview Light in Under 10 Minutes?
- When to Pick Up Gear to Avoid Paying for an Extra Day?
- When to Switch from Tripod to Gimbal During a Live Event?
- How to Balance a Gimbal Correctly to Save Battery and Motor Life?
Why the Classic 3-Point Setup Still Works for 90% of Corporate Interviews?
In the quest for a minimalist kit, it’s tempting to dismiss foundational techniques. Yet, the classic three-point lighting setup (Key, Fill, Backlight) isn’t a rigid rule; it’s a powerful mental model that accelerates your decision-making on set. For a solo shooter, speed is paramount. Understanding this framework allows you to walk into any London office and instantly diagnose the lighting needs, rather than improvising from scratch. It’s the grammar of light that enables you to create clean, professional, and consistent results under pressure.
The goal isn’t always to physically place three separate lights. It’s about fulfilling the three roles. A large window can be your key light. A simple reflector can be your fill. Your single, powerful LED panel might serve as the key, while you use a small, pocket-sized light for the backlight or « hairlight. » This thinking transforms the environment into part of your kit. For corporate work, a polished look is non-negotiable, and this method is the fastest path to achieving it. The key is to maintain a pleasing contrast; industry-standard lighting ratios show that a key light that is roughly twice as bright as the fill (a 2:1 ratio) creates dimension without being overly dramatic.
This principle-based approach is the first pillar of Zero-Drag Filmmaking. It replaces guesswork with a reliable system, enabling you to work faster and with more confidence. You’re not just placing lights; you’re solving a visual problem with a time-tested formula. This frees up mental bandwidth to focus on what truly matters: the subject and their story.
How to Pack Lights for Flights Without Breaking Bulbs or Stands?
The philosophy of a Zero-Drag kit extends directly to how it’s transported. Your entire professional setup needs to be compact and durable enough to survive the London Underground, the back of an Uber, or even an airline’s baggage handlers. This is where the physical container of your system—the case—becomes as important as the lights themselves. The goal is a single, rollable, carry-on-sized case that houses everything except perhaps a tripod.
Hard cases with customisable foam interiors are the industry standard for a reason. They allow for a ‘nesting’ approach where every component has a designated slot. This not only protects the gear but also provides a visual checklist, ensuring you never leave a crucial clamp or cable behind. Efficient packing is an art form that directly impacts your on-set speed; if you know exactly where everything is, you’re not wasting precious minutes digging through a disorganised bag.
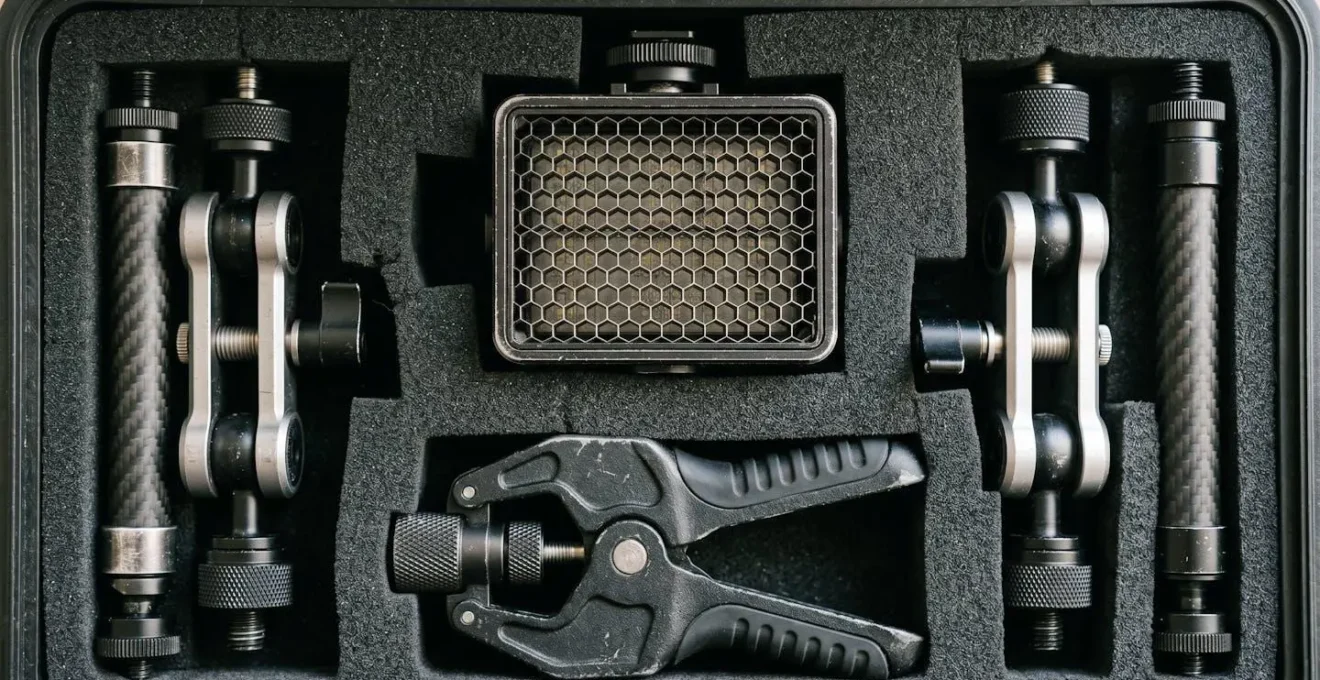
This level of organisation is not an obsession; it’s a professional necessity. As the following example shows, with the right choices, a surprisingly capable kit can fit into a small footprint.
Case Study: The Airline-Compliant Lighting Kit
Many professional videographers successfully pack complete lighting setups, including two portable LED lights, stands, and modifiers, into airline-compliant Pelican 1510 cases. The key to this efficiency is using modern, battery-powered LED lights, ensuring each battery is under the 100Wh flight restriction, and meticulously nesting equipment. Collapsible softboxes, compact light stands, and small-footprint clamps are chosen specifically for their packability, creating a dense yet perfectly protected mobile studio.
Choosing gear that packs down small and fits into a well-organised case is a direct application of the mobility-first principle. It removes the physical burden and mental stress of transport, a major friction point for any urban filmmaker.
Fresnel Kit or Soft Panels: Which is More Versatile for Documentaries?
Your choice of light source is a critical decision in the Zero-Drag system. The debate often comes down to two main types: LED Fresnels, which offer a hard, focusable beam, and LED Soft Panels, which provide a wide, diffuse source. While Fresnels are cinematic and offer precise control, they often introduce friction. They require more time to shape with barn doors, scrims, and diffusion, adding steps to your setup.
For the solo run-and-gun shooter, soft panels are typically the more versatile and efficient choice. Their inherent softness is flattering for most interview subjects, and they require minimal modification to look good. A modern bi-colour LED panel can be set up, powered on, and ready to shoot in under two minutes. This speed is a massive advantage when working with non-professional talent or in tight timeframes. As MasterClass lighting experts note, the physics are simple:
A smaller light source creates harder, distinct edges, while a bigger one softens the shadows
– MasterClass Lighting Experts, MasterClass Three-Point Lighting Guide
Soft panels, by their nature, are a larger source. While a Fresnel can be made soft with large diffusion frames, this adds more gear and setup time—the very friction we aim to eliminate. The following table breaks down the practical differences for documentary-style work.
This comparative analysis helps clarify the trade-offs based on your primary shooting style.
| Feature | LED Fresnel | Soft Panel |
|---|---|---|
| Light Control | Precise beam shaping | Wide, even coverage |
| Setup Time | 5-10 minutes | 2-3 minutes |
| Power Efficiency | Higher at distance | Better for close work |
| Weight | 1-2kg typical | 0.5-1kg typical |
| Best Use Case | Dramatic interviews | Corporate/quick setups |
For the agile filmmaker, the soft panel’s combination of speed, low weight, and flattering output makes it the cornerstone of a portable, efficient lighting kit.
The Ventilation Mistake That Shuts Down Lights During Long Interviews
One of the most disruptive friction points on a shoot is technical failure. For modern LED lights, the number one enemy is heat. Pushing a powerful light at high intensity for an hour-long interview generates significant thermal energy. If that heat cannot escape, the light’s safety circuits will engage, causing it to dim or shut down completely—a disaster during a critical take. This problem is especially acute in the exact environments a London shooter often faces.
Case Study: London’s Office Heat Traps
Modern office buildings, particularly in areas like the City or Canary Wharf, are often designed with sealed windows and centrally controlled air conditioning. This creates « heat traps » in smaller meeting rooms. Standard cooling fans built into LED lights are often insufficient to cope with the rising ambient temperature, requiring videographers to proactively scout locations during pre-production or bring their own thermal management solutions.
Anticipating this issue is part of the Zero-Drag philosophy. It’s not enough to have a good light; you must have a protocol to ensure it runs reliably. This involves more than just hoping for the best. Simple, proactive steps can prevent a thermal shutdown and keep your shoot on schedule. Running lights at the lowest power setting required, ensuring adequate airflow around the unit, and even « pre-stressing » the light before the talent arrives can identify potential issues early.
Your Pre-Shoot Thermal Checklist: Ensuring Light Reliability
- Pre-Shoot Test: Run lights at 80-100% power for 10-15 minutes before the interviewee arrives to check for thermal stability.
- Ambient Temperature Check: Assess the room’s temperature. In spaces above 24°C (75°F), be extra cautious and plan for lower power settings.
- Airflow Spacing: Position lights at least 1 meter away from walls, curtains, or any obstruction that could block their ventilation fans or heat sinks.
- Power Optimisation: Use the lowest power setting on your light that achieves the desired exposure on your camera. Don’t use 100% power if 40% will do.
- External Cooling: For long interviews in warm rooms, request that a small, quiet portable fan be placed near (but not in frame of) the light fixtures to aid circulation.
How to Set Up a Professional Interview Light in Under 10 Minutes?
The ultimate test of a Zero-Drag system is the speed of deployment. Arriving on location and being camera-ready in under 10 minutes is the goal. This isn’t about rushing; it’s about efficiency born from a well-honed system. It starts before you even arrive, with a pre-rigged approach. Your primary light should already be attached to its yoke and clamp in your case. Your batteries should be charged and ready to snap on. This eliminates the small, time-consuming steps of assembly on set.
The « one-light-plus-reflector » method is a solo shooter’s best friend. You place your single, battery-powered soft panel as the key light. Then, instead of setting up a second light stand and light for fill, you use a simple collapsible 5-in-1 reflector on the opposite side to bounce light back onto the subject, softening the shadows. This one move cuts your lighting setup time in half. The result is a clean, professional look achieved with minimal gear and maximum speed.
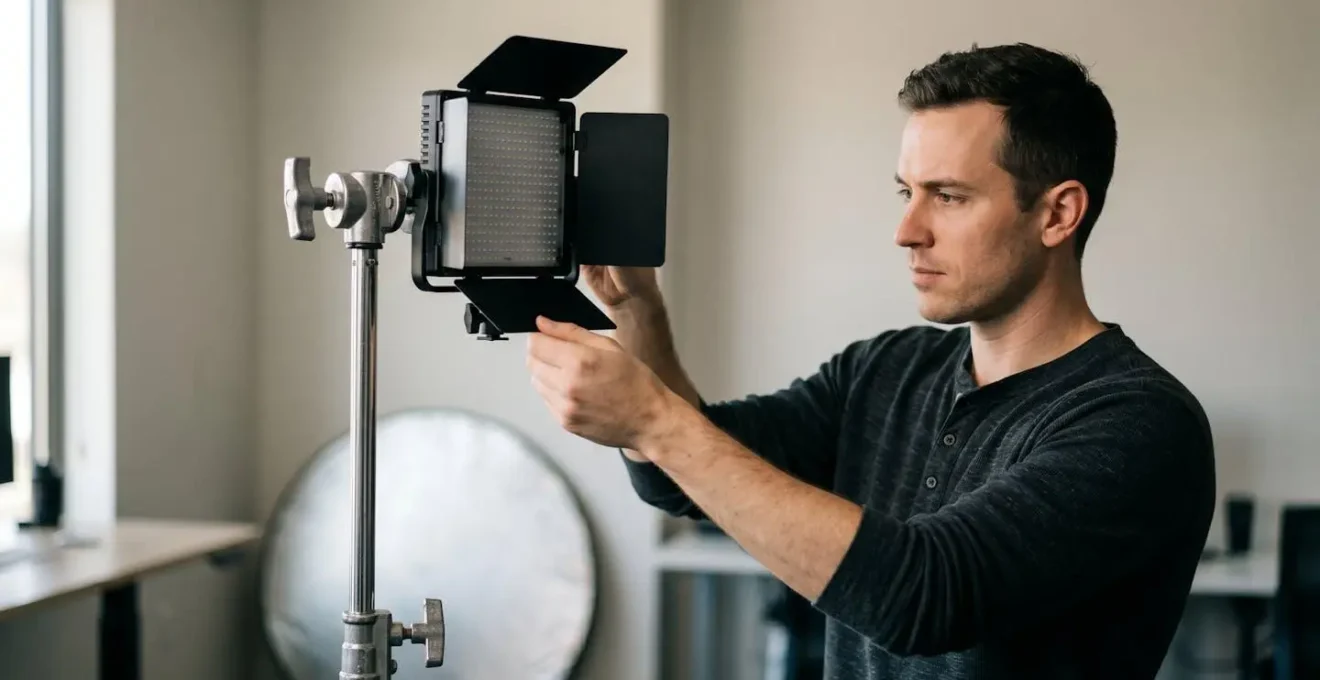
This rapid setup isn’t magic; it’s the culmination of every choice made so far: a lightweight soft panel, battery power, an organised case, and a principle-based lighting approach. Research shows that this methodical preparation pays huge dividends in time saved. In fact, reports suggest that pre-assembling lights before arrival can achieve a 50% reduction in setup time. This saved time is better spent building rapport with the client or finessing the composition of your shot.
When to Pick Up Gear to Avoid Paying for an Extra Day?
The Zero-Drag philosophy extends beyond the set; it encompasses the entire logistical chain, including equipment rental. For a London-based shooter, navigating the city’s rental houses is a strategic challenge. Paying for an extra, unused day on a rental is a common and avoidable friction point that eats into your profit margins. The key is to treat pickup and return times with the same precision as the shoot itself.
London’s geography and traffic patterns play a huge role. A rental house in Soho might be convenient for a central London shoot but a nightmare to return to during evening rush hour from a location in Zone 4. Conversely, a place in Park Royal might be easier for van access but adds significant travel time. You must actively calculate the cost versus the convenience. Furthermore, rental house policies are not uniform. Some offer a « weekend deal » (e.g., pick up Friday PM, return Monday AM for a one-day rate), which can be a huge cost-saver. Others have strict 24-hour clocks and punitive late fees.
Smart planning is essential. Always schedule your pickup with a buffer. Aiming to arrive two hours before closing can save you from a traffic jam that costs you an entire day’s rental fee. Similarly, be aware of factors like late-night Uber surge pricing, which can make a 10 PM return more expensive than simply keeping the gear for another day. It’s a calculation every solo operator must master.
When to Switch from Tripod to Gimbal During a Live Event?
A truly agile system includes camera support. While lighting is crucial, how you move the camera defines the energy of your final product. For the solo shooter, the choice isn’t tripod *or* gimbal; it’s tripod *and* gimbal, used strategically. Trying to cover an entire event solely on a gimbal is a recipe for fatigue and shaky, unmotivated footage. The gimbal is a specialised tool for specific moments, not a catch-all solution.
A highly effective professional workflow is the « Tripod as Home Base » method. You set up your tripod at a key vantage point to capture the most important static shots: the main speaker on a podium, the wide shot of the room, or a locked-off interview. This is your safe, stable coverage. The gimbal is then deployed for short, purposeful sequences. These might be 30-60 second bursts where you follow a key subject walking through the crowd, reveal the scale of a venue, or capture dynamic B-roll. This hybrid approach maximises coverage quality while minimising operator fatigue.
The decision of when to switch is guided by storytelling intent. As a rule of thumb, the tripod is for capturing statements, while the gimbal is for exploration and movement. This idea is a core tenet of professional event coverage.
Use a gimbal to follow a character or reveal information; stay on the tripod to capture a statement or moment of reflection
– Professional Videography Guidelines, Video Production Best Practices
By defining clear roles for each tool, you create a more dynamic and watchable final video without burning yourself out. This is the essence of working smarter, not harder.
Key takeaways
- A Zero-Drag System Is Your Goal: Prioritise a holistic system of lightweight gear, smart packing, and efficient logistics over individual product specs.
- Battery Power Is Non-Negotiable: For true mobility in an urban environment like London, eliminate cables wherever possible.
- Logistics Are Part of the Job: Your strategy for packing, transport, and rental returns is as crucial to your success as your on-set skills.
How to Balance a Gimbal Correctly to Save Battery and Motor Life?
Just as a poorly ventilated light can fail, an improperly balanced gimbal introduces significant friction into your workflow. When a gimbal is not perfectly balanced, its motors must constantly work overtime to hold the camera steady. This not only produces less smooth footage but also drastically drains battery life and can lead to premature motor burnout. For a run-and-gun filmmaker relying on battery power for a long shoot day, this is a critical failure point.
The benefits of a perfect balance are immense; some tests show that a perfectly balanced gimbal can achieve up to 40% longer battery life. This can be the difference between getting the last crucial shot of an event and packing up early. The goal of balancing is to achieve a « zero-gravity » state where the camera will hold any position on any axis, even with the gimbal’s power turned off. This means the motors are only working to counteract your movement, not to fight gravity.
The definitive method for this is the « Zero-G Float Test. » This involves balancing each of the three axes (tilt, roll, pan) independently until the camera « floats » in place no matter how you angle it. It’s a process that might take an extra five minutes at the start of the day but pays dividends in performance and reliability. Remember, any change to the camera’s weight distribution—adding a lens cap, plugging in a microphone, or even extending an LCD screen—requires a complete re-balance. Mastering this setup discipline is fundamental to a frictionless gimbal workflow.
Start building your own Zero-Drag system today. Evaluate every piece of gear and every step in your workflow not just on its technical specifications, but on its contribution to your speed, agility, and peace of mind on a busy London shoot.