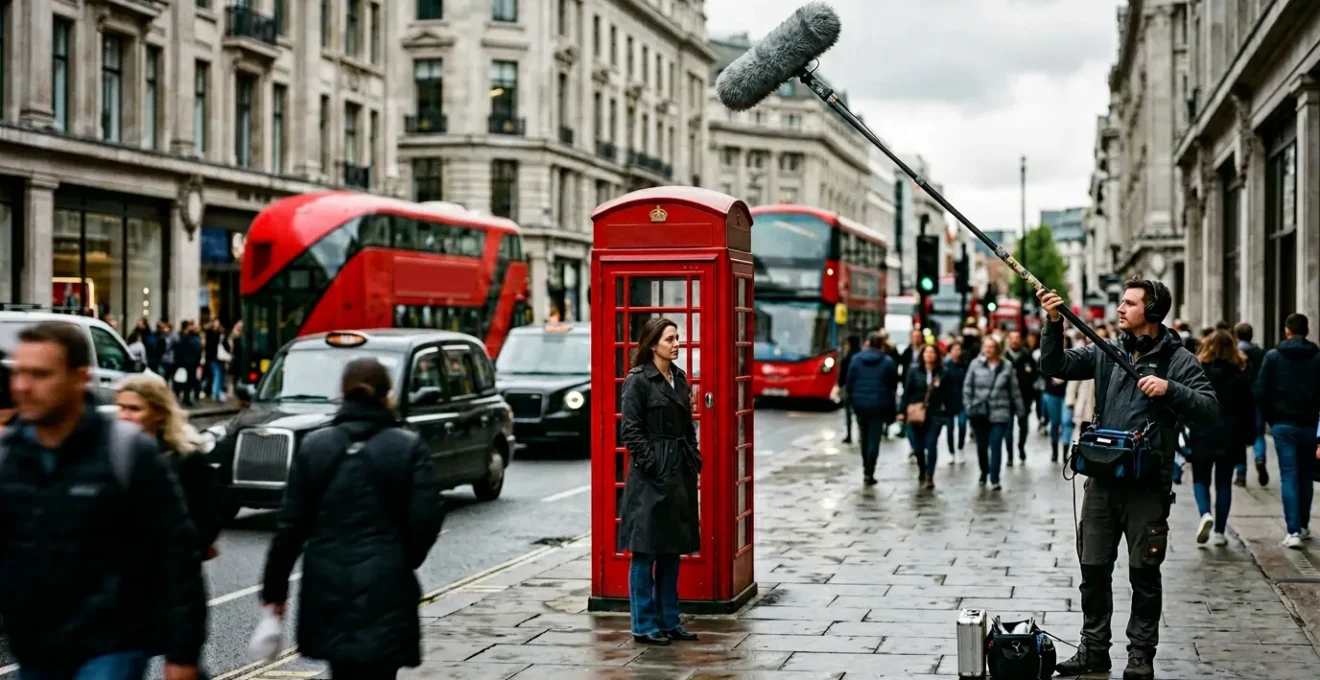
Capturing clean dialogue on a busy London street feels like an impossible task, but the solution isn’t a more expensive microphone. The key is to master the physics of sound and environment. By understanding how to create acoustic shadows, leveraging the precise function of your mic’s interference tube, and managing the chaotic radio frequency landscape, you can transform the urban environment from a source of noise into a tool for isolation, ensuring your dialogue is crisp, clear, and professional.
The scene is set: a vox-pop on Regent Street. The traffic is a constant roar, sirens wail in the distance, and crowds of people create a wall of ambient noise. Your job is to capture a single, clear voice amidst this chaos. The pressure is on. Many will tell you the obvious: get the microphone as close as possible to the subject’s mouth. While true, this advice barely scratches the surface and often isn’t enough when the background noise is overwhelming.
Others will recommend simply buying a more directional, expensive microphone. But professional location sound isn’t about brute force; it’s about finesse and a deep understanding of your tools and environment. The most common advice often misses the fundamental principles that separate amateur audio from broadcast-quality sound. What if the real secret to isolating dialogue wasn’t just about proximity, but about mastering the physics of sound itself?
This guide moves beyond the basics. We’re adopting the mindset of an audio-obsessed recordist, focusing on the « why » behind the techniques. The true art of location sound is turning the environment, even one as hostile as a London street, to your advantage. It’s about understanding acoustic shadows, the mechanics of phase cancellation in your microphone, and the strategic management of a saturated wireless spectrum. By mastering these concepts, you gain control.
This article provides a practical, field-tested framework for achieving pristine dialogue in the most challenging urban settings. We will dissect the technical principles and translate them into actionable steps, covering everything from microphone physics and placement to advanced wireless strategies tailored for London’s unique challenges. Let’s explore the techniques that will give your audio the clarity and presence it deserves.
Summary: A Field Guide to Urban Dialogue Isolation
- Why Covering the Ports on Your Shotgun Mic Ruins the Directionality?
- How to Boom from Above to Reject City Traffic Noise?
- Short Interference or Long Rifle: Which Mic fits Indoors with Low Ceilings?
- The Cabling Mistake That Results in Zero Audio Signal
- When to Use a « Dead Cat » vs a Foam Windshield?
- 2.4GHz Digital or UHF Analogue: Which Wireless System is Safer for Events?
- Why Low-Quality Audio Instantly Destroys Trust with British Consumers?
- How to Use Wireless Lavs in London Without Frequency Interference?
Why Covering the Ports on Your Shotgun Mic Ruins the Directionality?
A shotgun microphone’s superpower—its directionality—doesn’t come from magic, but from physics. The long barrel you see is an interference tube, and the slots cut into its side are critical. Sound from the front travels directly down the tube to the capsule. Sound from the sides, however, enters these ports at different points along the tube. This creates multiple paths to the capsule, causing sound waves to arrive slightly out of phase with each other. This phase cancellation is precisely what rejects off-axis noise, giving the mic its focused pickup pattern.
When you accidentally cover these ports with your hand, gaffer tape, or a poorly fitted shock mount, you block this mechanism. You effectively turn your highly directional shotgun mic into a much less directional omni or cardioid microphone. It loses its ability to reject side noise, and suddenly the London traffic you were trying to eliminate bleeds directly into your recording. The microphone’s line of sight must be clear, allowing background noise to strike the sides at the maximum rejection angle, while the sensitive front axis is aimed squarely at the dialogue.
Maintaining the integrity of the interference tube is non-negotiable for clean audio. It’s the difference between a voice that cuts through the mix and a voice that’s lost in a sea of ambient mud. To ensure you never make this critical error, follow this systematic check before every take.
Action Plan: Preventing Interference Tube Blockage
- Points of Contact: Check your grip. Never hold the interference tube itself. Your hand should only be on the microphone’s solid body (before the ports begin) or, ideally, on the shock mount’s handle.
- Component Inventory: Inspect your shock mount. Ensure the elastic bands are not stretched or sagging over any of the side slots and that the microphone is seated centrally without obstruction.
- Accessory Coherence: Verify windscreen placement. Foam windscreens must only cover the front capsule area and should never extend back over the interference tube’s slots.
- Auditory Check: Listen intently through your headphones for any ‘boxy’ or unnatural frequencies in the ambient sound. This is a tell-tale sign of partial port blockage altering the mic’s natural response.
- Correction Plan: If any issue is found, immediately adjust your grip, re-seat the microphone in its mount, or reposition the windscreen until the audio sounds open and natural again.
How to Boom from Above to Reject City Traffic Noise?
In a busy urban environment, the most pervasive noise source is low-frequency ground-level sound: traffic rumble, footsteps, and general street-level activity. The single most effective technique to combat this is not a filter, but strategic positioning. Booming from above allows you to leverage a powerful physical principle: the acoustic shadow. By placing the microphone over the subject’s head, you use their own body and any nearby physical objects (walls, vehicles) to physically block the path of ground-level noise from reaching the microphone’s capsule.
This technique dramatically improves your signal-to-noise ratio (SNR). While high-frequency sounds like sirens can still diffract around obstacles, the low-frequency rumble that makes dialogue sound muddy is significantly attenuated. The microphone is now in a quieter acoustic space, focused downwards on the voice. For optimal results, professional sound mixers maintain an ideal height of 2 to 3 feet overhead, angled slightly in front of the talent to capture the sound emanating from their mouth and chest.
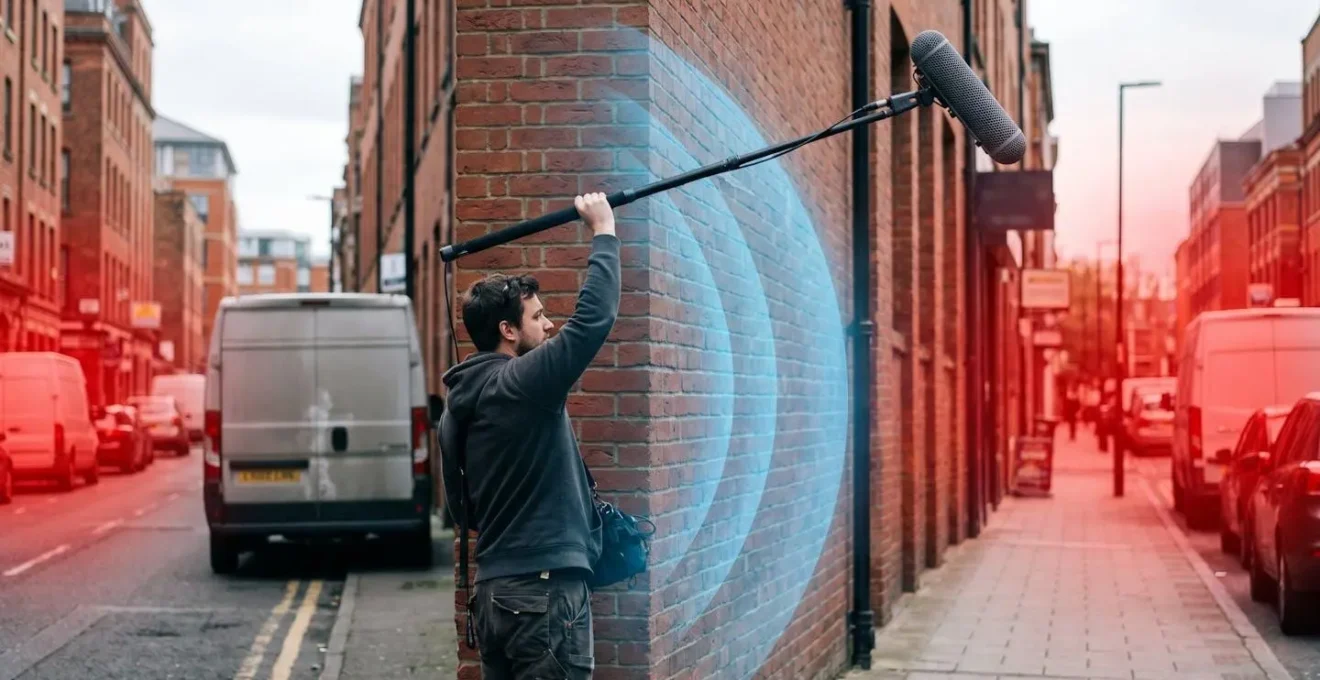
As this visualization shows, booming from above isn’t just about getting the mic closer; it’s a calculated move to place the mic in the quietest possible position relative to the dominant noise sources. This is far more effective than trying to fix a noisy recording in post-production. Before the camera rolls, coordinate with the cinematographer to understand camera and actor movements, ensuring you can maintain this optimal position without casting shadows into the shot. It’s a dance between light and sound, and mastering it is key to professional results.
Short Interference or Long Rifle: Which Mic fits Indoors with Low Ceilings?
While a long shotgun « rifle » mic is the go-to for isolating distant subjects outdoors, bringing it inside, especially in a room with low ceilings, is a recipe for disaster. The issue is, once again, physics. Indoor environments are full of hard, reflective surfaces. A long interference tube is highly sensitive to sound arriving from the sides, which it cancels out. However, when a sound source (like your talent’s voice) reflects off a nearby wall or ceiling, it arrives at the microphone’s side ports a split-second after the direct sound. The mic interprets this reflection as off-axis noise and attempts to cancel it.
This process, known as comb filtering, creates a hollow, phasey, and unnatural sound, destroying the quality of your dialogue. The shorter the distance to the reflective surface, the worse the effect. For this reason, a shorter shotgun or, even better, a hypercardioid microphone without an interference tube, is the superior choice for indoor recording. These mics are less susceptible to the phase cancellation issues caused by early reflections.
As one professional sound recordist noted in a forum discussion:
Generally, for dialog, pros use a shotgun outdoors and a super/hypercardioid indoors. I.e., interference tube outdoors, no interference tube indoors. The one glaring exception is the wide use of the MKH416 for voiceovers. But that’s done in studios with soundproofing.
– Professional Sound Recordist, DPReview Forum Discussion
The choice of microphone must adapt to the acoustic properties of the space. This comparative table breaks down the key performance differences you need to consider.
| Feature | Short Shotgun | Long Shotgun |
|---|---|---|
| Indoor Performance | Excellent – minimal reflections | Poor – severe comb filtering |
| Optimal Distance | 3-4 feet overhead | 9+ feet overhead |
| Side Rejection | Good | Maximum |
| Best Environment | Small rooms, low ceilings | Outdoor, large open spaces |
The Cabling Mistake That Results in Zero Audio Signal
You can have the best microphone in the world, positioned perfectly, but it’s all for nothing if the signal doesn’t reliably reach the recorder. Cabling is the circulatory system of your audio setup, and it’s often the most common point of failure. The most devastating mistake is a simple one: no power or a faulty connection. Before any recording, you must verify your power source. Many shotgun mics can operate on either standard phantom power from the recorder or an internal battery. If you’re using phantom power, ensure there are no batteries left inside the microphone, as this can sometimes cause issues.
Next, always use high-quality, balanced XLR cables. Unbalanced TS cables are not an acceptable substitute; they lack the grounding that prevents radio frequency interference, effectively turning your cable into a giant antenna for London’s taxi radios and other stray signals. Once connected, perform a « wiggle test » at both the microphone and recorder connectors while monitoring the audio through headphones. This will reveal any intermittent faults or cold solder joints that might cause the signal to drop out during a crucial moment of dialogue.
Finally, physical cable management is critical. On a boom pole, any loose cabling must be securely taped or strapped down. A dangling cable can not only cause handling noise but also puts immense strain on the delicate XLR connector pins. A loose coil of cable can be secured to the operator’s belt. This meticulous attention to the « boring » parts of the setup is what ensures a stable, clean signal from talent to recorder, every single time.
When to Use a « Dead Cat » vs a Foam Windshield?
Wind is the nemesis of clean dialogue. Even a slight breeze across a microphone capsule can create low-frequency rumbling and pops that render audio unusable. Your first line of defense is a simple foam windshield. This is effective for indoor use, where it can diffuse air currents from HVAC systems, or in very light outdoor breezes. It provides basic protection with almost no impact on the microphone’s high-frequency response, preserving the crispness of the dialogue.
However, once you step outside onto a windy London street, foam is simply not enough. This is when you need to deploy the « dead cat » (or « dead kitten » for smaller mics). This furry cover works on a different principle. The synthetic fur dissipates the wind’s energy before it can hit the microphone capsule. The long hairs slow down the air, creating a layer of calm around the mic. As a rule of thumb, professional recordists switch from foam to fur when wind speeds exceed 5-7 mph.
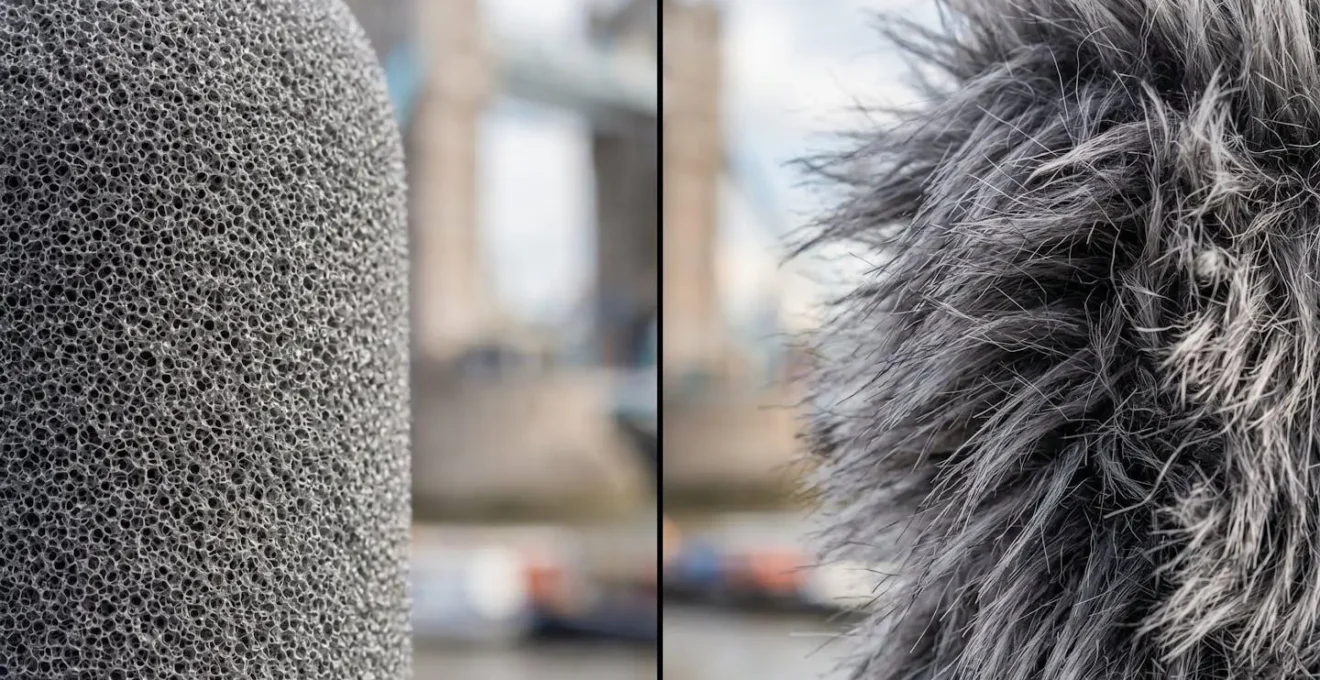
This protection comes with a slight trade-off: the dense fur can cause a minor roll-off in high frequencies, but this is a far more acceptable compromise than having your audio destroyed by wind noise. In extreme conditions, with winds over 15 mph, even a dead cat may not be sufficient. This is when a full blimp system is required, which combines a rigid outer shell, an internal shock mount, and a furry outer cover for maximum, multi-layer protection. Choosing the right level of wind protection is a constant calculation of risk versus reward, balancing the need for protection against the desire for maximum frequency clarity.
2.4GHz Digital or UHF Analogue: Which Wireless System is Safer for Events?
When you need to use a wireless lavalier in a dense urban setting like London, your choice of wireless technology can make or break the recording. The two main options are 2.4GHz digital systems and traditional UHF analogue systems. 2.4GHz systems are popular for their ease of use—they often pair automatically and operate on a globally unlicensed frequency band. However, this band is also home to Wi-Fi, Bluetooth, and countless other consumer devices. In a location like Central London, the 2.4GHz spectrum is incredibly saturated, leading to a high risk of dropouts and interference.
UHF (Ultra High Frequency) systems, which operate in the 470-694 MHz range, are the choice for mission-critical professional work. While they require a more deliberate setup process known as frequency coordination, they offer far greater reliability in crowded RF environments. The key is to find a clean, unoccupied frequency for your transmitter and receiver to use. Professional sound mixers in London use a combination of pre-production planning (checking Ofcom’s PMSE database for licensed frequencies) and on-site spectrum analysis to identify these clean channels.
While 2.4GHz digital systems offer encrypted transmission for content security, the raw reliability and superior range of a well-coordinated UHF system make it the safer bet for any professional event or shoot where audio failure is not an option. This table highlights the stark differences when operating in a challenging RF environment like London.
| Factor | 2.4GHz Digital | UHF Analogue |
|---|---|---|
| London Interference Level | Extremely High (Wi-Fi saturation) | Moderate (with scanning) |
| Dropout Risk | High in crowded areas | Low with proper frequency selection |
| Content Security | Encrypted transmission | Can be intercepted |
| Setup Complexity | Simple pairing | Requires frequency coordination |
| Range in Urban Environment | 30-50 feet typical | 100-300 feet typical |
Why Low-Quality Audio Instantly Destroys Trust with British Consumers?
In a media landscape shaped by the high production values of institutions like the BBC, British audiences have a deeply ingrained, often subconscious, expectation of audio quality. When a video or broadcast has poor sound—whether it’s hissy, distorted, or drowned out by background noise—it’s not just a technical flaw; it’s a breach of trust. Poor audio signals a lack of professionalism, a disregard for the viewer’s experience, and a fundamental amateurishness that undermines the credibility of the entire message.
Good audio should be invisible. It creates vocal presence, allowing the speaker’s message to connect directly with the listener without distraction. When done correctly, the mix sounds natural, and the audience can focus entirely on the content. When it’s bad, the audience’s first thought isn’t about the message, but about the poor quality of the production itself. This immediately pulls them out of the experience and erodes their confidence in the speaker or brand.
To achieve this professional standard, it’s not just about avoiding noise but also about proper gain staging. The goal is to capture a strong, clean signal without distortion. To this end, professional audio engineers maintain that audio levels capping at -12dB provide headroom to capture moments of excitement or laughter without clipping and turning into a noisy, distorted mess. This technical discipline is the foundation of audio that builds, rather than destroys, trust with a discerning audience.
Key Takeaways
- A shotgun mic’s directionality comes from its interference tube; never block the side ports with your hands, tape, or a poorly fitted mount.
- Booming from above is the most effective way to fight traffic noise, as it creates an « acoustic shadow » using the subject’s body to block ground-level sound.
- In London’s crowded RF environment, a well-coordinated UHF wireless system is significantly more reliable for critical dialogue than a 2.4GHz system, which is prone to Wi-Fi interference.
How to Use Wireless Lavs in London Without Frequency Interference?
Using wireless lavalier microphones in London is akin to navigating a naval battle in a canoe. The airwaves are an RF warzone, saturated with thousands of Wi-Fi networks in the 2.4GHz band, digital television (DTV) broadcasts, and other licensed and unlicensed signals. Simply turning on a wireless system and hoping for the best is a direct path to dropouts, static, and unusable audio. Success requires a systematic and proactive approach to frequency management.
Your strategy must begin before you even arrive on location. The first step is pre-production planning. About 48 hours before the shoot, check the Ofcom PMSE (Programme Making and Special Events) website to identify major licensed transmissions and events happening in your specific London borough. This gives you a baseline map of the frequencies to avoid.
Once on-site, and before the talent arrives, you must perform a full RF spectrum scan. Use the built-in scanner on your wireless receiver, but for best results, supplement it with a dedicated RF analyzer app on a smartphone or laptop. This creates a complete, real-time map of the local frequency landscape, allowing you to choose the cleanest, quietest channel available. During the entire recording, continuously monitor the audio feed through high-quality, closed-back headphones, listening for any early signs of interference. Finally, always employ redundancy. If possible, record the wireless lavalier to one channel of your recorder and a boomed shotgun mic to a separate channel. This gives you a critical backup and the option to blend both sources in post-production for the cleanest possible result.
Now, apply this systematic approach to your next urban shoot. By moving beyond simple tips and embracing the underlying physics of sound, you can take full control of your audio environment and deliver broadcast-quality dialogue, no matter how chaotic the street corner.