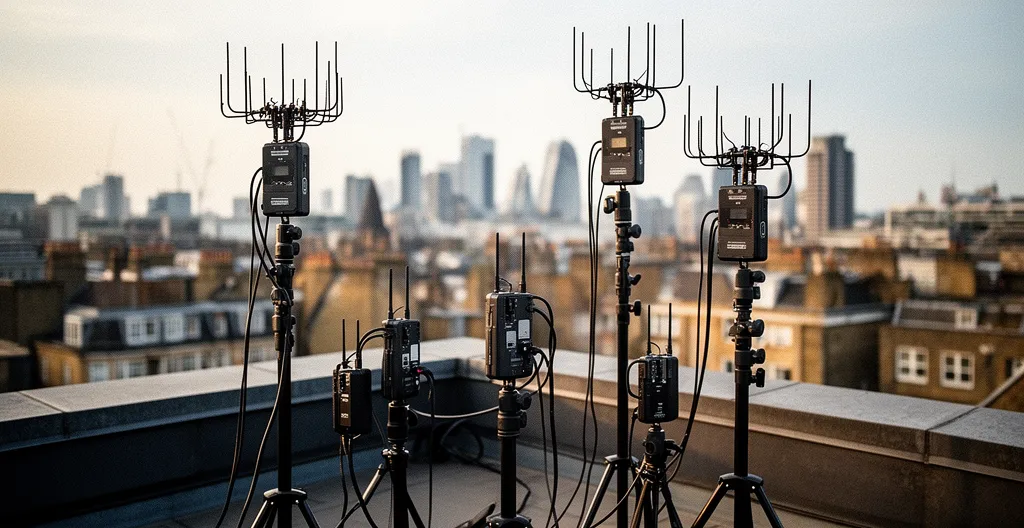
Operating wireless microphones in central London isn’t about finding a clear frequency; it’s about implementing a disciplined coordination framework to survive in a hostile RF environment.
- Success depends on a legal foundation, starting with a mandatory Ofcom licence for Channel 38, not on luck.
- Technical choices, like preferring licensed UHF over 2.4GHz systems and optimising antenna placement, are non-negotiable for signal integrity.
- A systematic three-scan workflow—on arrival, post-setup, and pre-roll—is the only reliable method to pre-empt interference.
Recommendation: Shift from a reactive « scan and hope » approach to a proactive strategy of risk mitigation that encompasses licensing, equipment selection, and a rigorous on-set workflow.
For a sound recordist, the hum of London is a constant challenge. But a far more insidious problem operates in silence: the city’s impossibly congested radio frequency spectrum. With news crews, private security, and countless Wi-Fi networks all battling for airwave supremacy, achieving clean wireless audio can feel like a game of chance. The common advice—scan for a clear channel and hope for the best—is woefully inadequate in this environment. It’s a reactive tactic in a situation that demands a proactive strategy.
Many professionals focus on the obvious issues like keeping a line of sight or using quality equipment, but they often neglect the systemic factors that lead to catastrophic signal dropouts. They might not fully grasp the legal framework governing Channel 38, or the precise physics of how a human body can absorb a radio signal when a presenter turns. These aren’t minor details; they are the fault lines where professional productions fail.
The real key to robust wireless performance in London is not about having the most expensive gear, but about adopting the mindset of an RF coordinator. This means moving beyond simple tactics to build a comprehensive framework for managing risk. It’s a discipline built on legal compliance, strategic equipment choices, and a meticulous on-location workflow. This guide is not a list of tips; it’s a systematic approach to establishing RF control in one of the world’s most hostile environments.
This article provides a complete strategic framework, from the legal requirements and technology choices to the specific on-set techniques needed to ensure your wireless audio remains clean and reliable, even in the heart of the city. Explore the sections below to master each component of professional RF management.
Summary: A Strategic Framework for RF Management in London
- Why Using Channel 38 Requires an Ofcom License in the UK?
- How to Hide a Lav Mic Under a Shirt Without Clothing Rustle?
- 2.4GHz Digital or UHF Analogue: Which Wireless System is Safer for Events?
- The Placement Mistake That Causes Signal Dropouts When Talent Turns Around
- When to Scan for Clear Frequencies: Upon Arrival or Just Before Rolling?
- How to Boom from Above to Reject City Traffic Noise?
- The Copyright Trap That Could Cost Your Company £20,000 in Fines
- How to Isolate Dialogue in a Busy London Street Using a Shotgun Mic?
Why Using Channel 38 Requires an Ofcom License in the UK?
Operating in the UK requires adherence to a strict legal framework for spectrum use, managed by Ofcom. The primary frequency band allocated for Programme Making and Special Events (PMSE) is Channel 38, which spans 606.5 MHz to 613.5 MHz. This is a shared but protected space, meaning that to legally use it, a license is not optional—it is a mandatory prerequisite. Operating without one is a breach of the Wireless Telegraphy Act 2006 and risks equipment seizure and prosecution.
The licensing system exists to coordinate users and prevent the very interference professionals seek to avoid. A license grants you the right to operate within this coordinated band, with the understanding that other licensed users may also be present. The alternative, using licence-free bands like Channel 70 (863-865 MHz) or the 2.4GHz spectrum, places you in direct competition with countless consumer devices, from Wi-Fi routers to baby monitors, making them fundamentally unreliable for professional work in London.
The financial barrier to compliance is minimal compared to the professional risk of signal failure. The cost is set by Ofcom and is designed to be accessible. For example, official documentation shows a standard UK-wide license costs just £85 per year for shared access to this protected spectrum. This nominal fee provides the legal and technical foundation upon which all other RF strategy is built. To obtain one, follow the official procedure:
- Step 1: Visit the Ofcom PMSE licensing portal and create an account.
- Step 2: Select the ‘UK Wireless Microphone Licence’ which grants access to Channel 38 (606.5-613.5 MHz).
- Step 3: Choose the appropriate license duration, typically one or two years for shared access.
- Step 4: Provide the necessary production details, which may include location, dates, and equipment specifications.
- Step 5: Complete the payment and ensure your license documentation is accessible for any on-site inspection.
How to Hide a Lav Mic Under a Shirt Without Clothing Rustle?
Achieving clean lavalier audio begins at the source: a secure, noise-free placement on the talent. Clothing rustle is the primary enemy, caused by the friction between the microphone capsule, its cable, and fabric. The core principle of professional concealment is not just hiding the mic, but isolating it from movement. This requires creating a stable, buffered mount that prevents any direct contact between the fabric and the microphone head.
A common technique is the « moleskin sandwich. » This involves placing a strip of high-quality medical moleskin tape on the skin, positioning the microphone on top, and securing it with a second strip. This creates a rigid, non-resonant housing. Another critical technique is the creation of a « decoupling loop » or « strain relief loop » in the cable. By forming a small loop in the lavalier cable and taping it down or securing it with a tie clip a few inches below the microphone, you ensure that any tugs or movements on the cable are absorbed by the loop and not transmitted to the microphone capsule itself, which is a major source of noise.
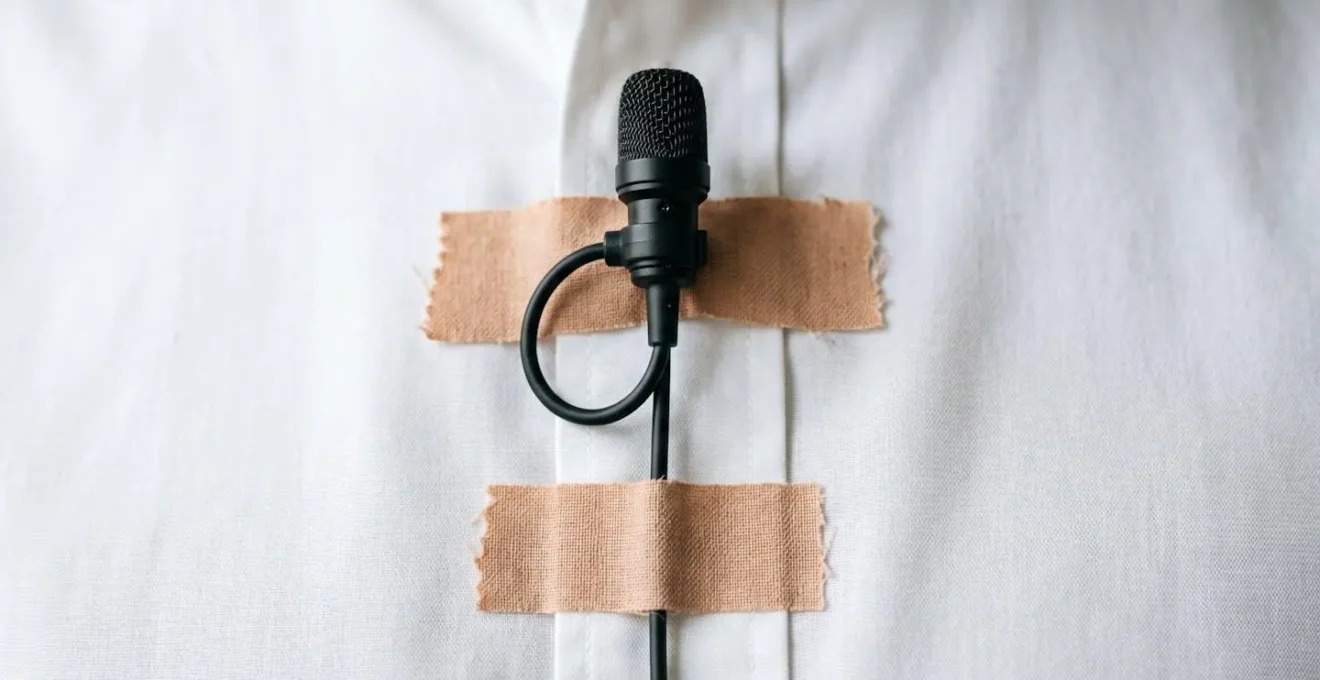
As the image demonstrates, a successful placement is meticulous. It involves a combination of secure mounting with accessories like moleskin or specialized mounts like the RØDE invisiLav, and strategic cable management. Once the mic is placed, it is essential to have the talent perform their expected range of motion—turning, sitting, walking—while you monitor the signal for any signs of rustle. This pre-roll check allows for micro-adjustments that can save a take from being unusable.
2.4GHz Digital or UHF Analogue: Which Wireless System is Safer for Events?
The choice between 2.4GHz and UHF (Ultra High Frequency) systems is a critical strategic decision, especially in London. While 2.4GHz digital systems offer convenience and licence-free operation worldwide, they are fundamentally unsuited for high-stakes professional use in dense urban environments. The 2.4GHz band is a chaotic, shared space, home to Wi-Fi, Bluetooth, security cameras, and myriad other devices. This creates an unpredictable and hostile RF environment where signal integrity is not guaranteed.
Case Study: The Reality of Range in a Dense RF Environment
Field tests by manufacturers like Hollyland provide a clear illustration of the problem. While a 2.4GHz system like their Lark M2 might achieve an impressive range of up to 1000ft in open-air, optimal conditions, this figure is misleading for urban use. As their own testing indicates, in a saturated environment like London, that effective range can plummet to as little as 100-150ft due to overwhelming Wi-Fi interference. In contrast, professional UHF systems consistently maintain a range of 500ft or more even in challenging cityscapes, thanks to their superior ability to penetrate obstacles and operate in a less congested, managed spectrum.
Licensed UHF systems, operating in protected bands like Channel 38, are the professional standard for a reason. Analogue UHF transmission offers near-zero latency, which is critical for live-to-screen events and camera monitoring, whereas digital systems inherently introduce a small delay that can be problematic. Furthermore, UHF signals have a longer wavelength, allowing them to better penetrate through crowds, walls, and other obstructions. The following matrix, based on common London scenarios, provides a clear decision-making framework.
| Scenario | 2.4GHz Digital | UHF Analogue | Recommendation |
|---|---|---|---|
| Office interview in The Shard | High Wi-Fi density interference | Requires Channel 38 license | Licensed UHF |
| Street interview in Soho | Unpredictable interference | Better penetration through crowds | Licensed UHF only |
| Controlled studio setup | Acceptable if Wi-Fi managed | Most reliable option | Either acceptable |
| Live-to-screen events | Higher latency issues | Near-zero latency | UHF strongly preferred |
The Placement Mistake That Causes Signal Dropouts When Talent Turns Around
One of the most common and frustrating sources of signal dropout occurs when the talent turns their body. The cause is not random interference, but a fundamental principle of physics: the human body is an excellent absorber of RF signals. Composed largely of saltwater, the body effectively acts as a shield, blocking the path between the transmitter and receiver. The most frequent mistake is placing the transmitter pack on the talent’s lower back while the receiver is positioned forward of them, for instance, on a camera.
Case Study: The Body-Blocking Effect
Audio documentation from Performance Hall clearly demonstrates this issue. Placing a microphone on the chest and the transmitter on the lower back creates a direct line of absorption when the talent turns 180 degrees. The signal must travel through the entire torso, causing severe attenuation and likely dropouts. Their recommended solution is to position the transmitter pack on a belt or in a pocket at the hip, on the same side of the body as the receiver antennas. This simple change can maintain a viable line of sight during a full turn.
However, transmitter placement is only half of the equation. On the receiver end, proximity and antenna configuration are paramount. Every foot of distance increases « path loss, » weakening the signal. This is why mounting a receiver on a camera 30 feet away is far riskier than having it in a sound bag just 10 feet from the talent.
Case Study: Camera Mount vs. Sound Bag Placement
Further field testing highlighted in Performance Hall’s audio guide reveals a startling difference. Camera-mounted receivers were found to suffer from 40% more dropouts compared to sound bag placement. Positioning the receiver in a dedicated sound bag 10-15 feet from the talent, rather than on a camera 30+ feet away, can reduce path loss by as much as 6dB, a significant improvement that eliminates the majority of turn-related dropouts.
Finally, leveraging the receiver’s diversity system through proper antenna placement is crucial. A diversity receiver uses two independent antennas; if one loses the signal, the other takes over. To maximise this benefit, you must position the antennas correctly to capture the signal regardless of its orientation.
When to Scan for Clear Frequencies: Upon Arrival or Just Before Rolling?
This question presents a false choice. In a hostile RF environment like London, a single frequency scan is insufficient. The RF landscape is not static; it changes as different departments power up equipment, as nearby productions begin their work, or even as security personnel change their communication patterns. A frequency that was clear upon arrival can be unusable an hour later. The professional standard is not a single scan, but a disciplined, multi-stage scanning workflow.
This systematic process is a core component of « frequency hygiene. » It’s about building a comprehensive understanding of the RF environment and re-validating your choices at critical moments. An initial scan provides a baseline of the fixed interference sources, such as DTV channels. The second scan, post-setup, is arguably the most critical, as it reveals new interference generated by your own production’s lighting, monitors, and cameras. The final pre-roll check is a quick confidence scan to catch any last-minute surprises, ensuring the frequency you chose is still viable the moment you hit record.
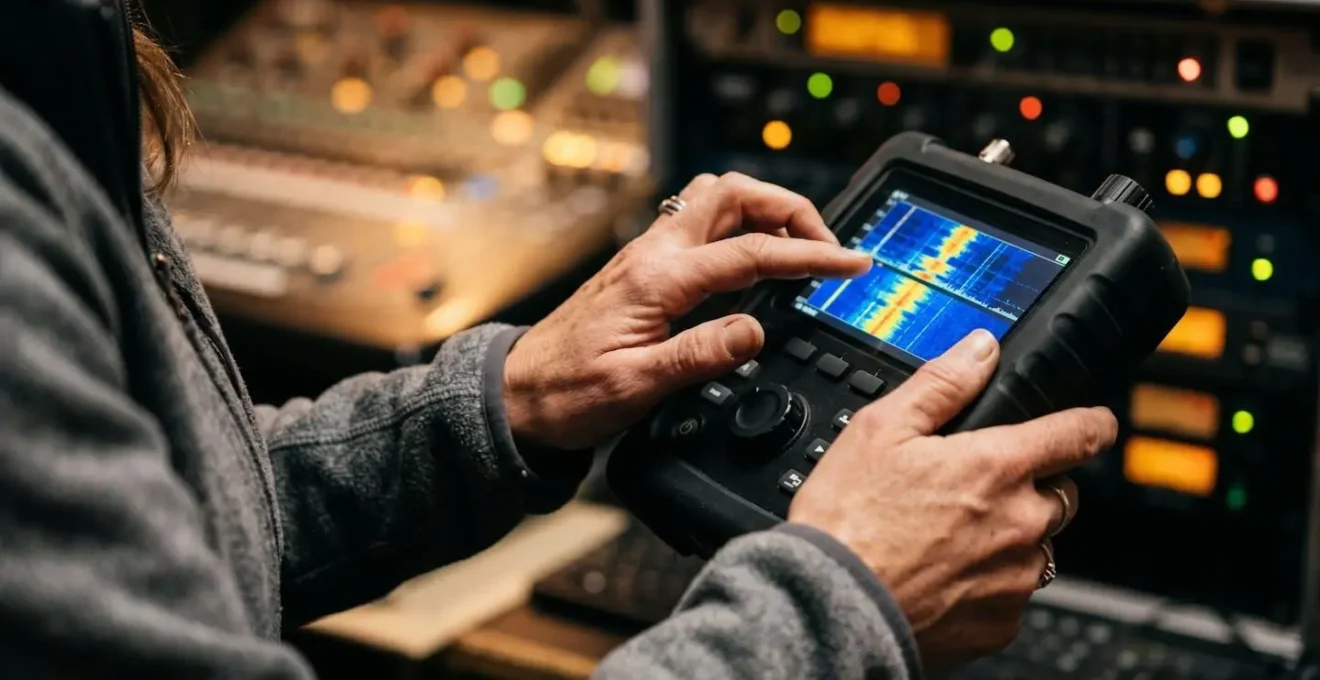
A professional spectrum analyzer, as shown above, allows you to visually identify the noise floor and pinpoint clean, unoccupied frequency blocks. This is not guesswork; it is data-driven decision-making. Documenting your findings—both the clear frequencies you use and the sources of interference you identify—is also invaluable for any future work at the same location. This workflow transforms frequency management from a reactive guess into a proactive, documented procedure.
Your Action Plan: The Three-Scan Professional Workflow
- Initial Arrival Scan: Before any other gear is set up, perform a full scan to assess the general RF landscape. Identify and log powerful, persistent sources like DTV channels and fixed installations.
- Post-Setup Scan: After all departments (lighting, camera, video village) have powered on their equipment, re-scan. This is crucial for identifying interference generated by your own production.
- Pre-Roll Confidence Check: Just minutes before the first take, conduct a final, quick scan on your chosen frequencies. This confirms they are still clear and catches any last-minute RF « pop-ups ».
- Document Findings: Keep a log of clear frequencies and identified interference sources for each location. This builds a valuable database for future shoots.
- Set Squelch Appropriately: Based on the noise floor discovered during your scans, set your receiver’s squelch threshold. It should be high enough to reject background RF noise but low enough to accept the weakest usable signal from your transmitter.
How to Boom from Above to Reject City Traffic Noise?
While lavaliers are essential, a well-positioned boom microphone is often the primary tool for capturing rich, natural-sounding dialogue. In a noisy environment like a London street, its effectiveness hinges on one key principle: using the microphone’s polar pattern to reject unwanted sound. Every directional microphone has a « null point »—an angle at which it is least sensitive. The art of booming in a city is to aim this null point directly at the primary noise source, typically street-level traffic.
By booming from above and angling the microphone down towards the talent’s mouth, the hypercardioid or supercardioid pattern naturally places the rear null point upwards and backwards, away from the subject. This orientation inherently rejects sound from the sides and rear. However, in a city of glass and steel, direct noise is only part of the problem. Sound reflections from building facades can be just as intrusive.
Case Study: Polar Pattern Optimisation Against Reflective Surfaces
Professional crews working in London have developed a specific technique to combat this. As documented by audio professionals, they strategically position the shotgun mic to place its null not only towards the primary traffic noise but also towards its most significant reflection. By booming from above at a precise 45-degree angle, the microphone’s pickup pattern captures the talent’s voice while the null faces both the street-level source and the secondary reflections bouncing off glass buildings. According to field reports, this technique can achieve a 10-15dB improvement in the signal-to-noise ratio, a dramatic enhancement in dialogue clarity.
This technique is further enhanced by aggressive high-pass filtering. Engaging an 80Hz or even a 120Hz filter on the mixer or recorder will eliminate the low-frequency rumble of traffic and underground trains without significantly thinning out the human voice. Combined with strategic talent positioning (e.g., having a sound-absorbing surface like a brick wall behind them), these methods transform the boom mic from a simple capture device into a sophisticated tool for acoustic isolation.
The Copyright Trap That Could Cost Your Company £20,000 in Fines
While RF management focuses on technical compliance, it exists within a broader ecosystem of production legality. A failure in one area can invite scrutiny into all others. The severe penalties for non-compliance in related fields, such as music licensing, serve as a stark warning. For instance, the unauthorised public performance of copyrighted music is a significant legal breach.
This is not a theoretical risk. In the UK, organisations like PPL and PRS for Music actively enforce these rights on behalf of artists and labels. The penalties for infringement are substantial, with fines that can reach up to £20,000 under the UK Copyright, Designs and Patents Act 1988. While this specific law governs music rights, it illustrates the serious financial consequences of overlooking legal compliance in any aspect of production.
This principle extends directly to spectrum management. Operating a wireless microphone on a frequency for which you do not hold a valid license is a criminal offence under the Wireless Telegraphy Act. While the fines may differ from copyright law, the consequences are just as severe, including the seizure of all non-compliant equipment, a court summons, and a potential criminal record for the operator or production company. The « trap » is assuming that because something is technically possible, it is legally permissible. In the world of professional production, ignorance of the law is never a defence.
Key takeaways
- In London’s saturated RF environment, licensed UHF is the only reliable choice over 2.4GHz for professional audio.
- A disciplined three-scan workflow (on arrival, post-setup, pre-roll) is mandatory to proactively manage interference.
- Proper microphone and transmitter placement to avoid body absorption and using the null point of a boom mic are critical physical techniques for clean audio.
How to Isolate Dialogue in a Busy London Street Using a Shotgun Mic?
Isolating clean dialogue on a busy street is the ultimate test of a sound recordist’s skill. It requires a combination of correct tool selection and flawless technique. The primary tool is the shotgun microphone, but not all shotguns are created equal. The choice of polar pattern—the microphone’s directional sensitivity—is the first critical decision. The goal is to select a pattern that is highly focused on the front while aggressively rejecting sound from the sides and rear.
For outdoor scenes with significant ambient noise, a shotgun microphone with an interference tube design offers the tightest pickup pattern and the best side rejection. This makes it superior at isolating a sound source from a distance. The choice between a hypercardioid and a supercardioid/lobar pattern depends on the specific situation, such as the width of the shot and the presence of nearby reflective surfaces, as detailed in the selection guide below.
| Pattern Type | Best Use Case | Rejection Angle | Distance Range |
|---|---|---|---|
| Hypercardioid | Tight indoor spaces with reflections | 110° rear null | 3-6 feet optimal |
| Supercardioid/Lobar | Wide street scenes, distant subjects | 126° rear null | 6-12 feet optimal |
| Shotgun (Interference tube) | Maximum side rejection outdoors | Narrow front lobe | 8-15 feet optimal |
However, the right microphone is useless without the right technique. Even with the best shotgun mic, distance is the enemy. The further the mic is from the source, the more ambient noise it will pick up relative to the dialogue. For dynamic scenes like a « walk and talk » interview, maintaining a consistent, optimal distance is a significant challenge.
Case Study: The Walk and Talk Technique
To solve this, professional sound operators employ a specific technique. As demonstrated by experienced crews, the operator moves slightly ahead of the talent, walking backwards while keeping the boom pole aimed precisely at the talent’s mouth. This demanding technique ensures the microphone remains at a consistent 4-6 foot distance, well within its optimal range. This continuous adjustment keeps the dialogue-to-ambient-noise ratio high, resulting in a reported 20dB improvement in dialogue isolation compared to a static boom position that cannot adapt to the talent’s movement. It is this synthesis of tool and technique that separates amateur from professional results.
By implementing this strategic framework—from legal compliance and technology selection to meticulous on-set workflows and microphone techniques—you can transform wireless audio from a source of anxiety into a reliable component of your professional toolkit. To truly elevate your skills, the next logical step is to build a custom RF coordination kit tailored to the specific demands of your productions.