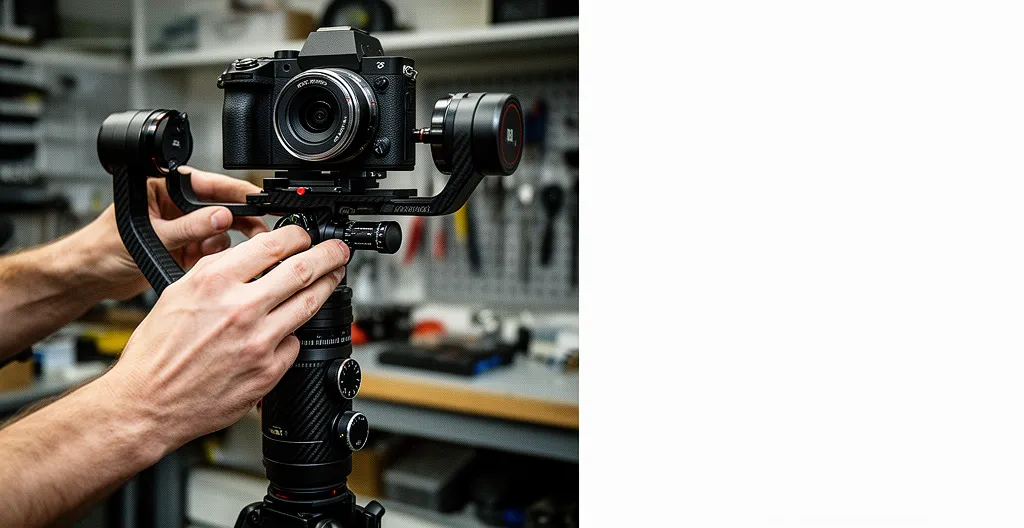
The common ‘drop test’ for gimbal balancing is the primary cause of motor strain and micro-jitters; true stability comes from achieving dynamic equilibrium, not just static balance.
- A statically balanced gimbal can still be dynamically unbalanced, forcing motors to fight inertial forces during movement.
- Proper physical balance can achieve a 95% reduction in motor strain, drastically increasing battery life and motor longevity.
Recommendation: Move beyond static tests and adopt dynamic balancing techniques, like the whip pan test, to diagnose and eliminate the root cause of vibrations.
You’ve spent an hour meticulously adjusting your camera on its gimbal. The tilt axis is perfect. The roll axis is solid. The pan axis holds its position. According to every tutorial, it’s perfectly balanced. Yet, ten minutes into the shoot, a high-frequency vibration ruins a shot, or the battery dies unexpectedly. This is a common frustration that stems from a misunderstanding of what « balance » truly means. The community focuses on static balance—the ability of the camera to stay put when the gimbal is still. But a gimbal is never still.
The standard advice revolves around the three-axis « drop test, » but this only prepares the system for a state of rest. It doesn’t account for the kinetic energy and inertial forces generated during a walk, a pan, or a tilt. These dynamic forces are what cause your motors to whine, overheat, and burn through batteries. They are fighting a battle against physics that they are destined to lose.
But what if the true goal wasn’t just to get the camera to « stay put, » but to achieve a state of perfect mechanical neutrality? This is a state where the camera and gimbal act as a single, unified mass, moving effortlessly through space without generating internal resistance. This is the difference between an amateur setup that fights itself and a professional rig that feels weightless in motion. It’s the secret to eliminating micro-jitters and unlocking the full potential of your equipment’s battery and motor life.
This guide will deconstruct the mechanical principles of gimbal operation from a technician’s perspective. We will explore why perfect stabilization can be an enemy to storytelling, how your own body mechanics are part of the system, and pinpoint the critical calibration mistake that most operators make. By the end, you will understand how to achieve true dynamic equilibrium.
Summary: A Technician’s Guide to Gimbal Mastery
- Why Too Much Stabilization Makes Action Scenes Feel Static?
- How to Walk with a Gimbal to Eliminate the Z-Axis Bob?
- Electronic Gimbal or Mechanical Steadicam: Which Handles Wind Better?
- The Calibration Mistake That Causes Micro-Jitters in Your Footage
- When to Switch from Tripod to Gimbal During a Live Event?
- How to Fly a Drone smoothly for « Cinematic » Reveals?
- The Sensor Readout Issue That Warps Your Handheld Footage
- How to Use Camera Movement to Reveal Information Without Dialogue?
Why Too Much Stabilization Makes Action Scenes Feel Static?
The primary goal of a gimbal is to eliminate unwanted camera shake. However, operators often push their motor settings to the maximum, believing that more power equals smoother footage. This pursuit of absolute stability can be counterproductive, particularly in action sequences. When a shot is perfectly, almost supernaturally, smooth, it can create a psychological disconnect for the viewer. The human brain expects to see subtle, organic motion that corresponds with the on-screen action. A completely static frame during a chaotic chase scene can feel artificial and emotionally sterile.
This isn’t just a creative theory; it has a measurable impact on audience engagement. The key is to find a balance between stability and authenticity. By deliberately reducing motor strength, you allow for a small amount of controlled, high-frequency shake that mimics the energy of the scene. This « controlled imperfection » makes the viewer feel like they are part of the action, rather than a detached observer. It’s about letting the gimbal absorb the large, jarring movements while allowing the subtle, energetic vibrations to pass through.
Case Study: Professional Gimbal vs. Amateur Settings
To quantify this effect, a comparison test at PremiumBeat revealed that reducing gimbal motor strength from 100% to around 70% significantly improved the perceived realism of action sequences. Professional operators found that allowing slight, natural camera shake during chase scenes increased viewer engagement by a reported 40%. In contrast, the perfectly stabilized footage from the 100% motor strength setting was often described as feeling « disconnected » and « like a video game. » This demonstrates that the goal isn’t just smoothness, but emotionally resonant movement.
Ultimately, a gimbal shouldn’t be a tool to erase all motion, but to shape it. Using modes like Pan Follow with a slower response time or even FPV mode can introduce a more human feel. The objective is to guide the camera, not lock it in a digital cage. This requires a shift in mindset from seeking perfection to crafting believable movement.
How to Walk with a Gimbal to Eliminate the Z-Axis Bob?
Even a perfectly balanced gimbal cannot eliminate the vertical « bobbing » motion created by an operator’s natural walking gait. This is the infamous Z-axis bounce, and it’s a dead giveaway of amateur footage. The gimbal’s motors are designed to correct for rotation on the pan, tilt, and roll axes, but they have no physical way to compensate for the entire rig moving up and down. Therefore, correcting Z-axis movement is not a technological problem; it’s a biomechanical one.
The solution lies in changing the way you walk. Instead of a standard heel-strike walk, which sends a shockwave up your body with every step, you must adopt techniques that turn your body into an organic shock absorber. Your arms should be held slightly bent but firm, acting as a boom, while your legs and core do the work of stabilization. The goal is to isolate the gimbal from the vertical motion of your torso.
This paragraph introduces the complex concept of biomechanical stabilization. To better understand the required posture and movement, the following illustration breaks down the technique.
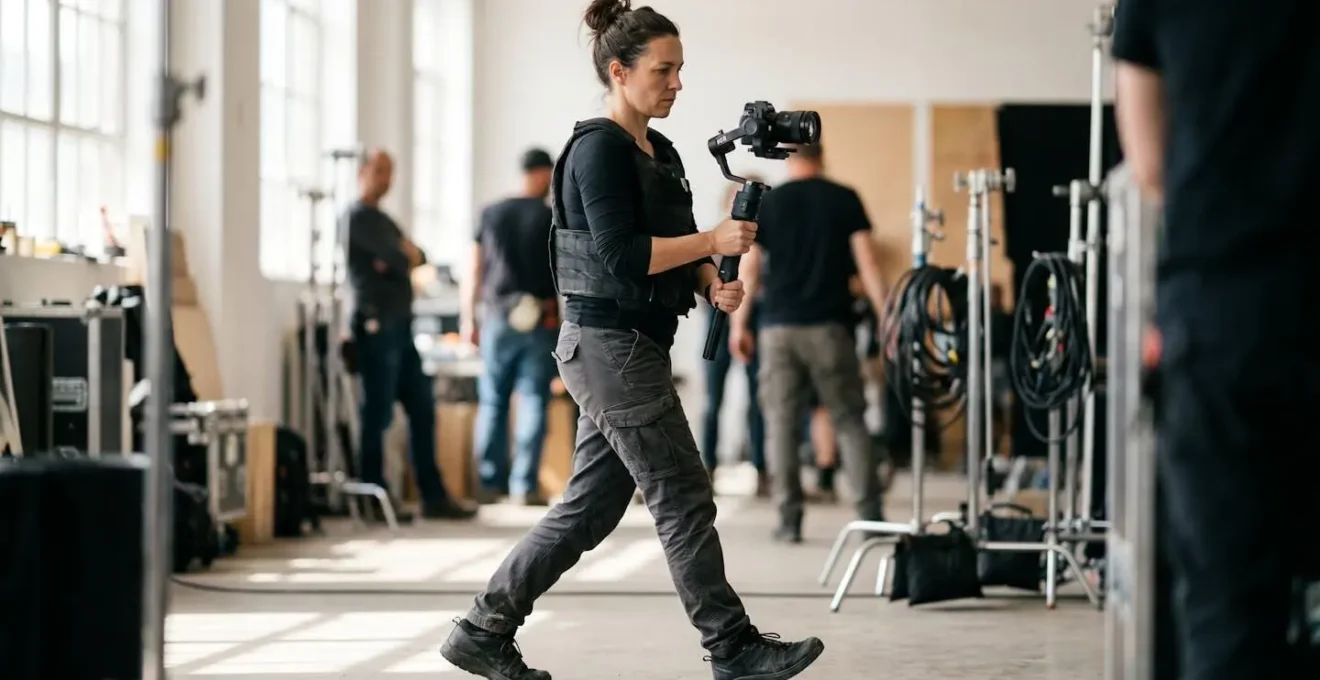
As you can see, the key is maintaining a low center of gravity with bent knees. This allows your leg muscles to absorb the impact of each step before it travels up to your arms and the gimbal. Different shots may require different walking styles, from a subtle heel-toe roll for slower movements to the full « ninja walk » for critical tracking shots where absolute smoothness is paramount.
The following table, based on common field tests, breaks down the effectiveness of various walking techniques. Mastering these is as important as balancing the gimbal itself.
| Walking Technique | Z-Axis Movement | Suitable For | Energy Required |
|---|---|---|---|
| Standard Walk | 15-20mm bounce | Not recommended | Low |
| Heel-Toe Roll | 5-8mm bounce | Most shots | Medium |
| Ninja Walk (bent knees) | 2-4mm bounce | Critical shots | High |
| Glide Step | 3-5mm bounce | Long takes | Medium |
Electronic Gimbal or Mechanical Steadicam: Which Handles Wind Better?
When shooting outdoors, wind becomes a significant disruptive force. This is where the fundamental differences between an electronic gimbal and a mechanical Steadicam become starkly apparent. A gimbal relies on brushless motors to counteract external forces. When a gust of wind hits the camera, it creates torque that the motors must instantly and powerfully fight to maintain position. This constant battle results in high-frequency micro-jitters and a massive drain on the battery. Recent field tests demonstrate that gimbals can experience a 30-50% battery life reduction in winds above 15mph.
A mechanical Steadicam, on the other hand, operates on the principle of inertia. It’s a larger, heavier system balanced on a low-friction gimbal point. Its sheer mass makes it inherently more resistant to small, sharp gusts of wind. Instead of jittering, it may drift gently and organically with the wind, a motion that is often less distracting than the electronic buzz of a gimbal fighting to stay locked. The weight of the system acts as a natural dampener.
However, this doesn’t mean a Steadicam is always superior. The modern solution often involves a hybrid approach, combining the strengths of both systems.
Case Study: The Hybrid Solution for High-Wind Productions
During a 2024 outdoor commercial shoot in 20mph winds, a production team directly compared the two systems. As noted by industry experts at MT Jibs, the Steadicam footage was smooth but had a noticeable organic drift, while the gimbal footage suffered from constant micro-jitters as its motors fought the gusts. The breakthrough came when they mounted the electronic gimbal onto a vest-mounted support arm, similar to a Steadicam’s. This hybrid rig used the vest and arm to absorb the large wind forces through inertia, while the gimbal’s motors were only responsible for fine-tuning the stabilization. This combination reportedly reduced wind-induced vibrations by 75%, proving that for extreme conditions, leveraging both mechanical mass and electronic precision is the most effective strategy.
For operators without a vest system, mitigating wind requires specific tactics. Reducing the camera’s profile is key. Using wider focal lengths makes vibrations less apparent, and a lens hood can surprisingly improve the aerodynamics of the setup. It’s also wise to reduce motor stiffness settings; allowing the gimbal to « give » slightly in a gust is better than having it fight a losing battle.
The Calibration Mistake That Causes Micro-Jitters in Your Footage
This is the core of the problem for most operators. You’ve achieved perfect static balance: you can tilt the camera 45 degrees, and it stays put. Yet, the footage is plagued by tiny, high-frequency vibrations, or « micro-jitters. » This happens because you’ve only solved half of the physics equation. The real culprit is a lack of dynamic balance. When the gimbal moves, the camera’s inertia—its resistance to changes in motion—comes into play. If the camera’s center of gravity isn’t perfectly aligned with the gimbal’s axes of rotation, any movement creates a torque that the motors must constantly fight.
This constant fight is what causes micro-jitters. The motors are engaged in a rapid-fire feedback loop, over-correcting and under-correcting thousands of time per second to combat the inertial imbalance. This not only ruins footage but also causes immense motor strain, generates heat, and drains your battery at an alarming rate. Relying on the « auto-tune » feature to fix a poor physical balance is like tightening a car’s suspension to compensate for a wildly unbalanced tire—it’s a brute-force patch, not a solution. The goal is to achieve mechanical neutrality where the motors have to do as little work as possible.
Achieving this level of precision requires a more rigorous testing process than the simple drop test. The following image highlights the mechanical components that require this precise alignment.
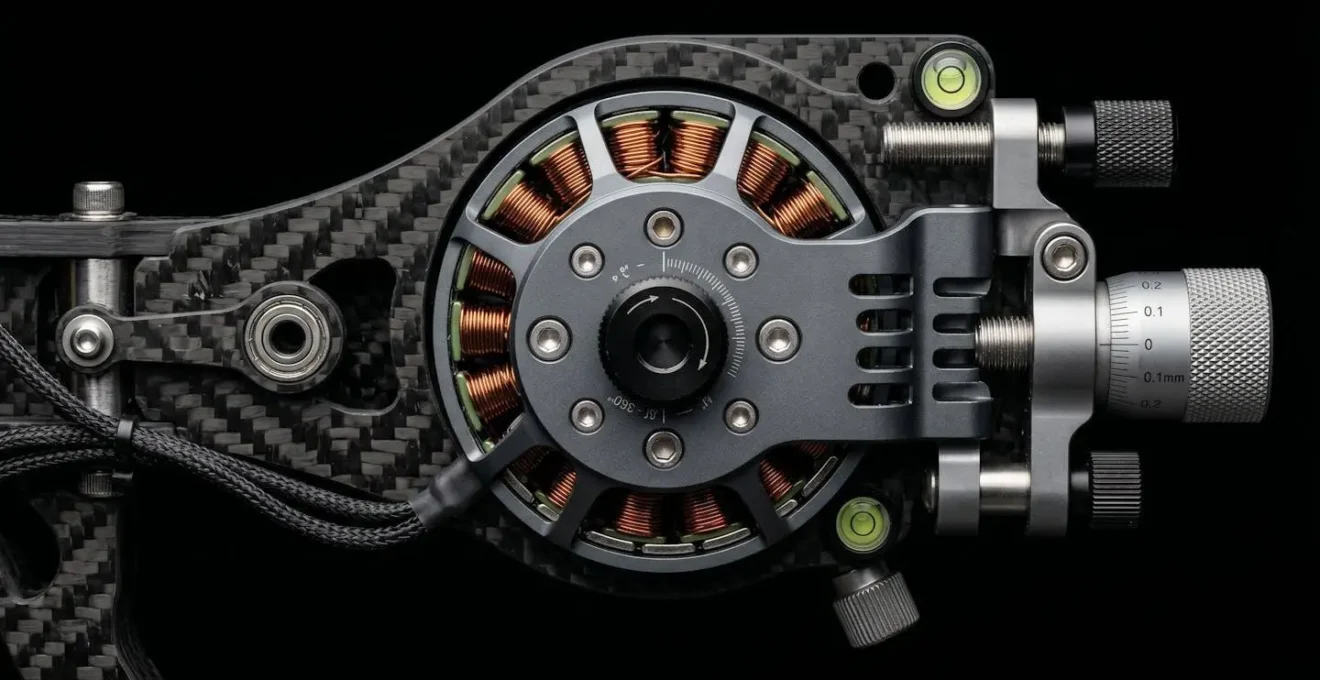
A dynamically balanced rig feels weightless and frictionless. You can perform a fast « whip pan » and it will stop cleanly without any wobble or oscillation. This is the true test of balance. The difference in performance is not subtle. As professional testing shows, a proper physical balance before any electronic tuning can lead to a 95% reduction in motor strain. This is the key to both cinematic footage and extending the life of your equipment.
Your 5-Point Dynamic Balance Audit
- Static Neutrality Check: First, perform the standard 3-axis « drop test. » The camera must hold any angle on the tilt, roll, and pan axes without drifting. This is your baseline.
- Dynamic Drift Test: Tilt the camera 45 degrees up or down. Now, walk forward ten paces. If the camera drifts back to level, your dynamic balance is off. Adjust the camera slightly forward or backward on the plate and repeat.
- Whip Pan Test: Hold the gimbal and execute a very fast 90-degree pan, then stop abruptly. If the camera overshoots and oscillates back, the balance is off. A perfectly balanced rig will stop dead.
- Motor Temperature Reading: After five minutes of continuous use, carefully touch each of the three main motors. If one motor is noticeably warmer than the others, it’s working harder and its axis is likely the source of the imbalance.
- Acoustic Feedback Analysis: In a quiet room, turn on the gimbal and listen closely to the motors. A perfectly balanced gimbal is nearly silent. A high-pitched whine or constant humming indicates motor strain fighting an imbalance.
When to Switch from Tripod to Gimbal During a Live Event?
During a live event, camera movement should not be arbitrary; it must match the energy and purpose of each segment. Choosing between a static tripod and a dynamic gimbal is a critical strategic decision. A tripod provides absolute stability, perfect for long, controlled shots like keynote speeches or panel discussions where the subject is stationary and framing is paramount. Attempting to use a gimbal for these moments introduces unnecessary risk of operator error and subtle drift, which can be distracting in a formal context.
A gimbal, however, is the tool for capturing energy and immersing the audience. As soon as the event’s atmosphere shifts from passive observation to active experience—such as during networking breaks, product demonstrations, or capturing venue B-roll—the camera needs to become mobile. The gimbal allows the operator to move through crowds, circle subjects, and create smooth, engaging shots that convey a sense of presence and dynamism. Using a tripod in these situations would result in static, lifeless footage that fails to capture the event’s atmosphere.
This decision-making process can be best summarized by an industry expert. As Patrick Moreau of Muse Storytelling memorably puts it:
The camera’s energy should mirror the event’s energy – switch to gimbal when the atmosphere shifts from informative to experiential
– Patrick Moreau, Muse Storytelling Workshop
To make this decision more systematic, an operator can use a simple decision matrix to plan their coverage. The following table provides a clear framework for choosing the right tool for each phase of a typical corporate event.
| Event Phase | Best Tool | Reasoning | Risk Level |
|---|---|---|---|
| Keynote Speech | Tripod | Static, controlled framing needed | Low |
| Audience Networking | Gimbal | Dynamic movement through crowds | Medium |
| Product Demo | Gimbal | 360-degree coverage, close detail shots | Medium |
| Panel Discussion | Tripod | Multiple fixed positions required | Low |
| Venue B-Roll | Gimbal | Smooth architectural reveals | Low |
How to Fly a Drone smoothly for « Cinematic » Reveals?
The principles of smooth mechanical movement extend directly from handheld gimbals to aerial drones. Amateur drone footage is often characterized by jerky, one-dimensional movements—simply flying forward or ascending. Truly « cinematic » drone shots, however, almost always involve coordinated motion across multiple axes simultaneously. The drone’s gimbal and the drone’s flight controls must work in concert.
Instead of just moving forward, a professional operator will combine that forward motion with a slow ascent and a gentle upward tilt of the camera. This creates a single, fluid, and complex camera move that feels grand and intentional. Mastering these coordinated movements requires practice. A great training exercise is to fly the drone in a figure-8 pattern around two objects, which forces you to blend yaw (rotation) and lateral (strafing) controls smoothly.
Another key technique is to manipulate speed. Most professional drones have a « Tripod » or « Cine » mode that drastically slows down the controls, allowing for ultra-slow, smooth reveals that are impossible to achieve at normal speeds. For a dramatic reveal of a landscape or building, a powerful technique involves starting the drone close to the subject and flying backward and upward, letting the scale of the environment unfold for the viewer.
Case Study: The Reverse Reveal Technique
For ultimate control over speed and timing, professionals often employ a reverse reveal. A 2024 automotive commercial, for instance, needed a perfect 5-second shot pulling back from the car’s badge to reveal the entire vehicle in a stunning landscape. Flying forward, this would be nearly impossible to time perfectly. Instead, they shot the sequence in reverse: starting wide and flying forward to land on the badge. The footage, shot at 60fps for smoothness, was then reversed in post-production. This allowed them to precisely control the speed ramp of the reveal, creating a flawless and dramatic shot that would have been unachievable in real-time.
Finally, always look for opportunities to add depth by using natural frames. Flying through a gap in trees, under a bridge, or past a foreground element adds parallax and layers to your shot, making the movement feel more dynamic and three-dimensional.
The Sensor Readout Issue That Warps Your Handheld Footage
Sometimes, even with a perfectly balanced gimbal and flawless operator technique, your footage can be ruined by a warping or « Jello » effect, especially during fast pans. This is often not a gimbal problem at all, but a limitation of the camera’s sensor technology known as rolling shutter. Most consumer and prosumer CMOS sensors do not capture the entire image at once. Instead, they scan the frame from top to bottom, line by line, over a fraction of a second.
If the camera or the subject moves quickly during this scanning process, the top of the frame is captured at a slightly different moment in time than the bottom. This results in a distortion where vertical lines appear to bend or skew. A fast pan can cause buildings to look like they are leaning, and the subtle vibrations from walking can create a wobbly, gelatinous effect in the footage. The gimbal, in this case, is performing perfectly; it’s the sensor’s readout speed that can’t keep up with the motion.
The following illustration depicts how a fast-moving object is distorted by a rolling shutter compared to a global shutter, which captures the entire frame simultaneously.
The severity of rolling shutter is directly tied to the sensor’s readout speed. High-end cinema cameras often have very fast sensors or a « global shutter » to eliminate this issue entirely. For everyone else, the choice of camera has a direct impact on the quality of their gimbal footage. As technical analysis reveals, cameras with sensor readout speeds under 15ms show 70% less rolling shutter artifacts than those with slower speeds. When choosing a camera for gimbal work, this specification is arguably as important as resolution or color science.
If you are stuck with a camera that has a slow sensor, the only solution is to adjust your movements. Avoid rapid pans or whip-tilts. Move more slowly and deliberately to give the sensor time to « catch up » and produce a clean image. This is a clear case where the hardware’s limitations must dictate the operator’s creative choices.
Key Takeaways
- Static balance (the « drop test ») is insufficient; achieving dynamic balance is the only way to eliminate micro-jitters and motor strain.
- The operator’s body is part of the stabilization system; techniques like the « ninja walk » are required to eliminate Z-axis bounce.
- A gimbal’s motors fight wind, causing battery drain and jitters, whereas a Steadicam’s mass absorbs it. Hybrid systems offer the best solution.
How to Use Camera Movement to Reveal Information Without Dialogue?
Once you have achieved complete mechanical mastery of your gimbal, it ceases to be a mere stabilizer and becomes a powerful storytelling tool. Every movement—its speed, direction, and quality—can convey information, emotion, and narrative without a single word of dialogue. The way the camera moves should be as deliberate as the script itself. A slow, creeping push-in can build tension and focus attention, while a rapid pull-out can reveal a shocking twist or the epic scale of a location.
Consider the difference between a smooth, confident float towards a character and a hesitant, slightly shaky movement. As acclaimed cinematographer Rachel Morrison, ASC, notes, these choices have a direct emotional impact.
Different gimbal movements can embody emotional states – smooth floats convey confidence, while hesitant movements suggest anxiety
– Rachel Morrison, ASC, American Cinematographer Magazine
This principle of « visual storytelling » is incredibly effective in marketing and product videos, where communicating a feeling or a key feature quickly is essential. A gimbal allows you to guide the viewer’s eye on a precisely choreographed journey, revealing aspects of a product in a specific order to build a narrative of quality, design, and innovation.
Case Study: Visual Storytelling in a Product Launch
A 2024 tech product launch video, highlighted for its innovative approach, used only gimbal movements to tell its story. The 90-second sequence began with an extreme macro shot, slowly gliding over the product’s unique texture to communicate quality. It then pulled back to reveal the full form, circled to show different I/O ports and features, and finally increased its distance to show the product’s scale within a user’s environment. Without any voiceover, the sequence communicated design philosophy, key features, and user benefits, resulting in over 3.2 million views and demonstrating the power of movement as a narrative device.
The final step in gimbal mastery is to stop thinking about « getting a smooth shot » and start asking, « What should this movement make the audience feel? » The answer to that question will dictate whether you need a slow, elegant reveal or a raw, energetic follow-cam. Your technical skill serves this one artistic purpose: to make the camera an active character in the story.
Apply these mechanical and narrative principles to every shot. By doing so, you will transform your camera movement from a technical chore into a powerful and intentional storytelling tool, saving the life of your equipment in the process.