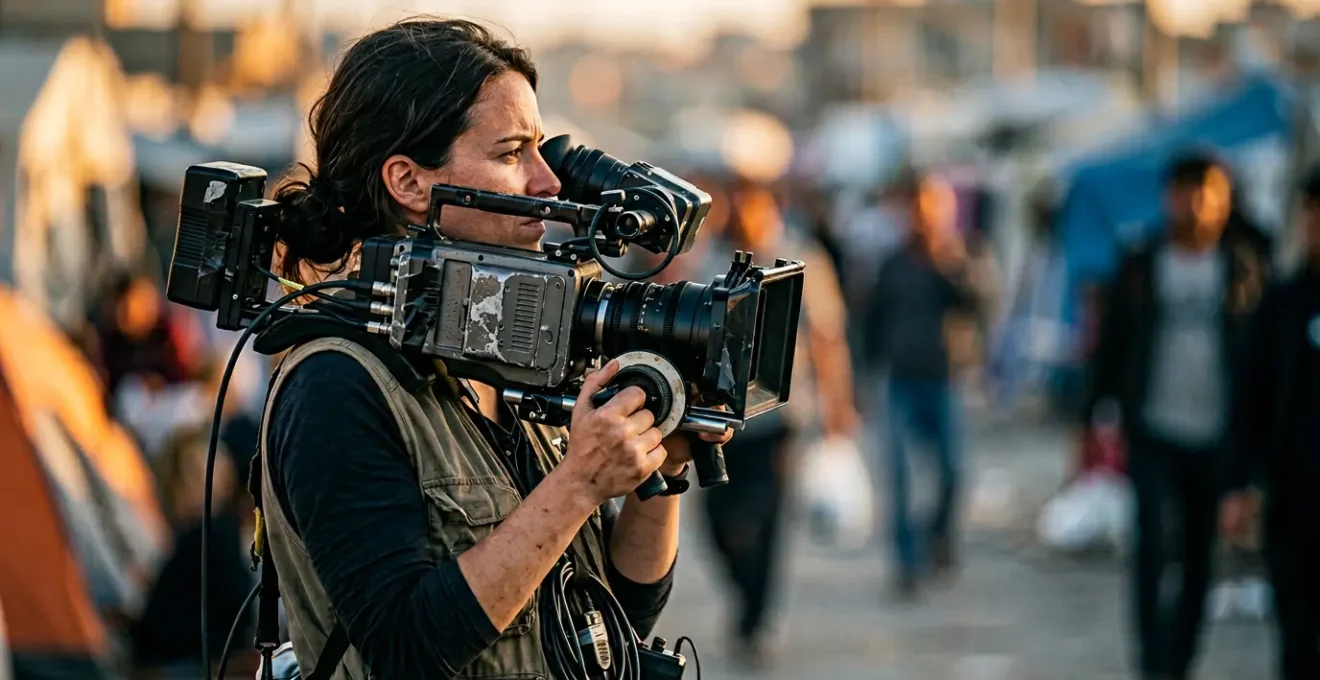
Contrary to the hype, a full-frame sensor’s shallow depth of field is often a liability, not a benefit, in the unpredictable world of documentary filmmaking.
- The relentless pursuit of « bokeh » sacrifices critical focus, rendering potentially powerful moments unusable in the edit.
- Super 35 offers a more manageable depth of field, lighter rigs, and a vast ecosystem of practical cinema lenses, prioritizing a sharp, stable image.
Recommendation: Prioritize image usability and a focus-first approach; choose the sensor format that allows you to reliably capture the story, not just a pretty picture.
You’ve been there. The subject delivers the perfect, unscripted line. The emotion is raw, the moment is electric… and it’s soft. The focus is a hair off, lost in that beautiful, creamy bokeh everyone told you was essential for a « cinematic » look. This is the quiet frustration of many documentary filmmakers who have embraced the trend of full-frame sensors. We’re sold on their low-light prowess and shallow depth of field, but we often ignore the steep, practical cost in a run-and-gun environment.
The common wisdom suggests that bigger is always better, that a larger sensor is an unqualified upgrade. But what if the key to powerful documentary work isn’t chasing the shallowest depth of field, but achieving narrative clarity? What if the « better » sensor is the one that allows you to be nimble, to react, and to nail focus when the unpredictable moment happens? This is the core of a focus-first approach, where the technical choices serve the story, not the other way around.
This article re-examines the full-frame debate from a practical, on-the-ground perspective. We will explore the physical reasons why maintaining focus is harder on larger sensors, discuss the true meaning of a « cinematic » look, and delve into the technical issues like rolling shutter and lens compatibility that directly impact your final footage. It’s time to move beyond the spec sheet and talk about what truly creates usable, compelling images in documentary filmmaking.
To navigate this practical reassessment, this guide breaks down the key considerations that will help you choose the right tool for your next documentary project.
Summary: Why Full-Frame Isn’t Always the Answer for Documentaries
- Why Is Maintaining Focus Harder on Large Sensors During Movement?
- How to Use Large Sensors to Shoot in Natural Light Without Grain?
- Super 35 or Full Frame: Which Look Feels More « Cinematic » for Narrative?
- The Sensor Readout Issue That Warps Your Handheld Footage
- How to Check if Your Vintage Lenses Cover a Large Sensor?
- Anamorphic vs Spherical: Which Lens Geometry Fits Architectural Videography?
- Why Does HDR Matter More Than 4K for Perceived Image Quality?
- How to Shoot for HDR Delivery Without Ruining the SDR Version?
Why Is Maintaining Focus Harder on Large Sensors During Movement?
The primary reason maintaining focus is more difficult on a full-frame sensor is a simple matter of physics: depth of field (DoF). For a given field of view and aperture, a larger sensor requires a longer focal length lens, which results in a significantly shallower plane of focus. This isn’t just a minor difference; the 1.5x crop factor between Super 35 and full-frame means that a 50mm lens on full-frame has a much thinner sliver of acceptable focus than its equivalent field of view on a Super 35 sensor. While this creates the sought-after « bokeh, » it’s a nightmare for a documentarian following an unscripted, moving subject.
In a narrative film, where actors hit their marks and a focus puller can rehearse the shot, this is manageable. In a documentary, your subject might lean forward unexpectedly, turn their head, or walk towards you without warning. That tiny, beautiful plane of focus becomes a trap. The shot you thought was a powerful close-up is now focused on their ear instead of their eye. This is why many seasoned professionals still prefer Super 35 for « multi-camera coverage, documentaries, or action where focus is challenging. »
This isn’t just theory; it’s reflected in the tools used by top filmmakers. An analysis of camera choices at major film festivals consistently shows a preference for the practicality of Super 35 in documentary contexts.
Case Study: Sundance 2024 Documentary Camera Choices
At the 2024 Sundance Film Festival, a significant number of documentary cinematographers opted for Super 35 sensor cameras like the Canon C300 Mark II and the Sony FX6/FX9 (often used in their S35 crop mode). In interviews, filmmakers frequently cited the need for a manageable depth of field as a key factor. When dealing with unpredictable subjects and fast-paced environments, the deeper focus of the Super 35 format provided a much higher ratio of usable, sharp footage, proving that in documentary, image usability is often prioritized over the aesthetic of an extremely shallow DoF.
Ultimately, the « best » look is the one that’s in focus. The ergonomic cost of constantly fighting for focus on a full-frame rig can outweigh its aesthetic benefits, especially when the story depends on capturing a fleeting, unrepeatable moment.
How to Use Large Sensors to Shoot in Natural Light Without Grain?
Large sensors are famed for their low-light performance, but this doesn’t make them immune to digital noise, or « grain. » The key to a clean image in natural light isn’t just the sensor, but a proper exposure technique. The primary advantage of a larger sensor is its higher signal-to-noise ratio, meaning the sensor captures more light (signal) relative to the inherent electronic interference (noise). However, if you underexpose a shot with the intention of « fixing it in post, » you are effectively amplifying the noise along with the image, resulting in a muddy, grainy look, regardless of sensor size.
The best practice is to « expose to the right » (ETTR), without clipping the highlights. This means making the image as bright as possible in-camera, maximizing the signal. When you later bring the exposure down in post-production, you are also pushing down the noise floor, resulting in a much cleaner image. This is far more effective than trying to lift a dark, noisy image.

Furthermore, it’s crucial to understand your camera’s native ISO. This is the sensitivity at which the sensor operates with the best dynamic range and lowest noise. Shooting at multiples of the native ISO is generally better than using in-between values, which are often just a digital push that increases noise. Instead of just cranking the ISO, try using a faster lens (lower f-stop) or, if the situation allows, adding a small, motivated light source to lift the shadows just enough to achieve a healthy exposure.
In the end, a large sensor provides a better starting point, but it’s not a magic bullet. Thoughtful exposure on set is always more powerful than noise reduction software in post, turning potential grain from a technical problem into a controlled, textural choice.
Super 35 or Full Frame: Which Look Feels More « Cinematic » for Narrative?
The idea that full-frame is inherently more « cinematic » than Super 35 is a modern marketing myth. For nearly a century, the vast majority of legendary films—from *The Godfather* to *Pulp Fiction*—were shot on 35mm film, a format whose physical dimensions are almost identical to a Super 35 digital sensor. The « cinematic look » is a product of masterful lighting, composition, lens choice, and production design, not simply a shallow depth of field.
The argument for Super 35 is rooted in this history and its resulting practicality. As one industry analysis notes, « Documentaries and commercial shoots tend to select Super 35 for speed, portability, and reliable lens options. » The lens ecosystem is a critical point. There is a far greater variety of purpose-built, high-quality cinema lenses, including zooms, designed specifically for the Super 35 image circle. Full-frame cinema lenses are often larger, heavier, and more expensive, increasing the ergonomic cost of the entire camera package.
This table breaks down the practical trade-offs that a documentary filmmaker must consider when choosing between the two formats. Notice how many of Super 35’s « cons » are actually « pros » in a documentary context.
| Feature | Super 35 | Full Frame |
|---|---|---|
| Sensor Size | ~24x14mm | 36x24mm |
| Depth of Field | Deeper (easier focus) | Shallower (harder focus) |
| Low Light | Good | Superior |
| Lens Options | Extensive cinema glass | Growing, but often heavier/pricier |
| Weight/Size | Lighter rigs possible | Generally heavier |
This data, highlighted in a comparative analysis of the formats, shows that the Super 35 platform offers a more balanced, practical approach for situations where agility and focus reliability are paramount. The narrative depth of field it provides is often more effective for storytelling, allowing the filmmaker to keep both the subject and their environment in reasonable focus, providing context.
Choosing Super 35 isn’t a compromise; it’s a conscious decision to use a tool that has been the backbone of cinema for generations, a tool that prioritizes storytelling control over a single, often problematic, aesthetic trend.
The Sensor Readout Issue That Warps Your Handheld Footage
One of the most jarring artifacts in handheld documentary footage is the « jello effect, » technically known as rolling shutter. This occurs on most CMOS sensors, which read the image from top to bottom, line by line, rather than all at once. During fast pans or with significant camera shake, this slight delay between the top and bottom of the frame causes vertical lines to skew and wobble, creating a distracting, unstable image that screams « digital video » in the worst way. For documentary work that relies on authentic, handheld movement, this can ruin an otherwise perfect take.
The issue is a direct consequence of sensor readout speed. While all rolling shutter sensors have this characteristic, the problem can be exacerbated by larger, higher-resolution sensors, as there is simply more data to read out with each frame. This makes quick, reactive camera movements—the bread and butter of verité filmmaking—particularly susceptible to warping and distortion.
The ultimate solution to this problem is a different type of sensor technology: the global shutter. A global shutter captures the entire image frame at the exact same instant, completely eliminating rolling shutter artifacts. Fast pans are crisp, and handheld footage feels solid and stable, more akin to the look of film.
The Global Shutter Revolution
Historically, global shutter sensors were rare and often came with a compromise in dynamic range or low-light performance. However, recent advancements have changed the game. Cameras like RED’s V-Raptor [X] and Komodo-X have brought high-quality global shutter technology to a more accessible price point. For documentary filmmakers, this is a revolutionary step. It allows for aggressive handheld work without the fear of the « jello effect, » ensuring that the image remains stable and free of distortion, which is critical for maintaining a professional and immersive viewing experience.
While not yet standard on all cameras, the rise of usable global shutter technology is a powerful argument for prioritizing a stable image over other sensor metrics when choosing a camera for dynamic, handheld work.
How to Check if Your Vintage Lenses Cover a Large Sensor?
Using vintage lenses is a popular way to add character and unique flare to digital footage, but pairing them with a full-frame sensor can be problematic. Many older lenses, especially those designed for 16mm or Super 35 film cameras, simply don’t project an image circle large enough to cover a full-frame sensor. This results in heavy vignetting (dark corners) or a hard, black circle around your image, rendering a significant portion of the frame unusable. Before you invest in a vintage lens for your full-frame camera, a simple test is crucial.
The goal of the test is to determine at which focal lengths and apertures the lens provides full coverage versus when it produces a vignette. Sometimes, a slight, soft vignette can be a desirable artistic choice, but a hard, dark edge is usually a technical flaw. Documenting the « safe » range for each of your vintage lenses is a vital part of pre-production.

This process doesn’t require complex equipment. It’s a quick, practical check you can do at home to map out the usability of your glass and avoid nasty surprises on set. The following plan provides a clear, step-by-step method for testing your own lenses.
Your Action Plan: Testing Vintage Lens Coverage
- Mount and Set Up: Mount the vintage lens on your full-frame camera. Set the camera to its full-frame sensor mode and ensure all exposure settings are in manual.
- Aim and Open Up: Point the camera at a uniformly lit, neutral surface like a white wall. Open the lens aperture to its widest setting (e.g., f/1.8). This is where vignetting will be most prominent.
- Check for Vignetting: Look at the corners of your camera’s monitor or viewfinder. If you see significant darkening or a hard black edge, the lens does not fully cover the sensor at this focal length and aperture.
- Test Focal Range: If you are using a zoom lens, slowly zoom from the widest to the tightest focal length. Note the exact focal length where the vignetting disappears. Many vintage zooms only cover full-frame at the longer end of their range.
- Document and Decide: Create a simple log for each lens, noting the focal lengths and apertures that provide full coverage. This allows you to know which settings are technically « safe » and which will produce an artistic (or unusable) vignette.
By taking a few minutes to perform this audit, you can confidently use your vintage glass, knowing its limitations and harnessing its character without compromising the technical integrity of your image.
Anamorphic vs Spherical: Which Lens Geometry Fits Architectural Videography?
While this article focuses on documentary, the debate around anamorphic lenses is relevant because it highlights the same core tension: a desired aesthetic versus practical usability. Anamorphic lenses, which squeeze the image horizontally to create a wide aspect ratio and distinctive oval bokeh, are often associated with a high-end « cinematic » look. However, their physical characteristics make them exceptionally challenging for most documentary situations. The question isn’t about architectural videography specifically, but about what the challenges of anamorphic lenses teach us about tool selection for unpredictable environments.
Anamorphic lenses are almost universally a poor choice for run-and-gun documentary work. They introduce a host of practical hurdles that run directly counter to the needs of a reactive filmmaker. As a detailed cinematography analysis points out, « Anamorphic lenses are often heavy, have slower apertures, and poor close-focus capabilities, forcing a more distant, observational style.«
Let’s break down these limitations from a documentarian’s perspective:
- Weight: Anamorphic lenses are significantly heavier and bulkier than their spherical counterparts. This adds to the ergonomic cost, making handheld work more fatiguing and less stable.
- Slow Apertures: They typically have a smaller maximum aperture (higher f-stop number), which limits their performance in the low-light situations where documentarians often find themselves.
- Close Focus: Their minimum focus distance is often much longer. You simply can’t get as close to your subject, which is a major constraint for intimate, personal stories.
- Focus Complexity: Many older or more affordable anamorphic lenses require pulling focus on two separate rings, making the already difficult task of focusing on a moving subject nearly impossible for a single operator.
The allure of the anamorphic look is strong, but for a documentary filmmaker, it’s a perfect example of how a stylistic choice can severely compromise your ability to capture the moment. It reinforces the central theme: choose the tool that lets you tell the story, not the one that fights you every step of the way.
Why Does HDR Matter More Than 4K for Perceived Image Quality?
In the conversation about image quality, resolution—specifically 4K—has dominated the marketing landscape. However, for the human eye, an increase in dynamic range and color information has a far more profound impact on perceived quality and realism than simply adding more pixels. This is the power of High Dynamic Range (HDR). While 4K defines the number of pixels, HDR defines the quality of those pixels: how bright, how dark, and how colorful they can be.
HDR technology allows a display to show a much greater range of contrast and a wider spectrum of colors. For a documentary filmmaker, this is a game-changer. It means you can capture a scene with a bright window and a dark interior and retain detail in both the highlights and the shadows, creating an image that feels much closer to what the human eye sees. This expanded contrast ratio is crucial for handling the uncontrolled lighting of most documentary environments.
Furthermore, HDR is about color volume. Standard Dynamic Range (SDR) displays have been the norm for decades, but modern display technology can achieve a much wider color space. Capturing for HDR delivery means working with 10-bit or 12-bit color depth, which allows for billions of colors instead of millions. This allows modern display technology to achieve up to 93% of the DCI-P3 color gamut, resulting in incredibly nuanced and lifelike gradients, which is especially important for rendering natural skin tones and rich landscapes.
HDR in the Field: Capturing Reality with More Fidelity
Documentary filmmakers who have adopted an HDR workflow report a significant advantage in verité situations. The ability to handle extreme contrast in a single shot—without blowing out highlights or crushing blacks—means less time is spent trying to control light and more time is spent capturing the moment. This extended dynamic range and color information provide much more flexibility in post-production, allowing a colorist to craft a look that is both natural and expressive, preserving the subtle details that make a scene feel authentic.
For your audience, a brilliant HDR image on a 2K screen will almost always look more impressive and « high-quality » than a flat, limited-range SDR image on a 4K screen. Prioritizing your capture workflow for HDR is one of the most effective ways to elevate the visual standard of your work.
Key Takeaways
- A deeper, more manageable depth of field is often a creative and practical advantage in documentary filmmaking, not a compromise.
- Image usability—meaning a shot that is sharp, stable, and properly exposed—is far more valuable than any single technical specification like sensor size.
- Choose your tools based on the physical reality of your project’s environment and story, not on marketing trends or the pursuit of a singular aesthetic.
How to Shoot for HDR Delivery Without Ruining the SDR Version?
Shooting for HDR while ensuring a great-looking Standard Dynamic Range (SDR) version is one of the key professional challenges in modern cinematography. The process, often called a « single-master workflow, » requires careful planning and a specific on-set mindset. Since the HDR version contains significantly more information about light and color, the goal is to capture the best possible HDR image and then create a derived, or « trimmed, » version for SDR displays. Getting this right starts long before the color grade.
The most common mistake is to light or expose a scene in a way that only works for one format. For example, if you create a scene with very deep, dark shadows that look great in SDR, those same shadows might look noisy and underexposed when viewed in HDR. Conversely, if you have extremely bright, specular highlights that look brilliant in HDR, they may appear as clipped, blown-out white blobs in the SDR version. The key is to protect both ends of the spectrum.
This means using your on-set monitoring tools, like a waveform monitor, to ensure you are capturing a full range of information without clipping your highlights or crushing your blacks into pure digital zero. You must light for the HDR image, giving it a full, rich exposure, while being mindful of how key elements will translate. A professional colorist sums it up perfectly: « The most critical step happens on set, not in post. The cinematographer’s lighting choices ensure both versions will be narratively coherent.«
In the color grade, a « trim pass » is performed where the colorist adjusts the HDR master to fit within the limited contrast and color space of SDR. If you’ve done your job on set, this process is about tastefully compressing the dynamic range, not trying to salvage a broken image. It’s about deciding how those bright highlights will roll off gracefully and where the shadow detail will sit, ensuring the story’s visual intent remains intact across both versions.
To apply these principles effectively, the next logical step is to critically evaluate your project’s specific delivery requirements and plan your on-set lighting and exposure strategy accordingly, long before you roll camera.