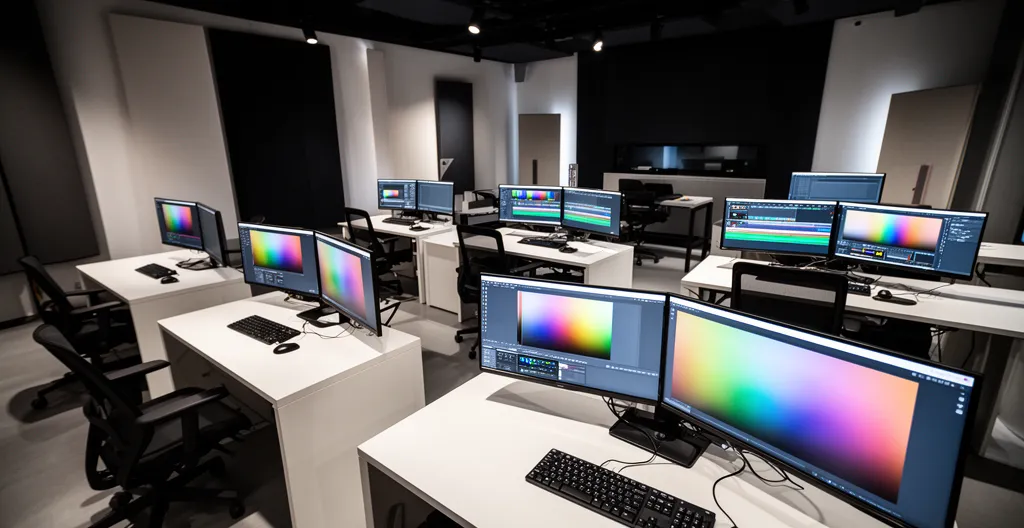
Bottlenecks are not random events; they are symptoms of a flawed production architecture that actively costs you money and time.
- Architecting folder structures and naming conventions directly impacts billable efficiency by reducing search time.
- Strategic decisions on cloud rendering, file locking, and backup schedules are financial choices, not just technical ones.
Recommendation: Stop firefighting and start architecting. Treat your pipeline as a quantifiable system with inputs, outputs, and potential points of systemic friction.
As a studio manager, you know the sound of a bottleneck. It’s silence. The quiet hum of workstations as an editor waits for a file transfer, a colourist re-renders a sequence because the edit changed, or a VFX artist searches for an asset lost in a sea of folders named « Final_Final_v2″. This is the sound of billable hours evaporating. The common advice— »name your files, » « communicate better »—treats these as isolated problems to be solved with checklists. But these are merely symptoms of a deeper issue.
The real problem isn’t the individual mistake; it’s the lack of a robust production architecture. A well-designed pipeline is not a list of rules but an engineered system, designed to maximize data velocity and minimize systemic friction. It anticipates points of failure and builds in redundancies and efficiencies from the ground up. The shift in mindset is crucial: you are not just managing projects; you are architecting a creative factory.
This article moves beyond generic tips to provide a systemic framework for designing a bottleneck-proof post-production pipeline. We will deconstruct each stage—from the foundational folder structure that dictates efficiency, to the client review process that finalizes your revenue—and provide architectural solutions that address the root cause of delays. The goal is to transform your workflow from a series of reactive fixes into a proactive, cost-aware, and highly efficient system.
To navigate this architectural approach, this article is structured to address the critical pillars of a modern post-production workflow. The following summary outlines the key systems we will build, from foundational data management to client-facing platforms.
Summary: Architecting an Efficient Post-Production System
- Why a Bad Folder Structure Costs You 15% of Your Billable Hours?
- How to Use Cloud Locking to Stop Editors Overwriting Each Other’s Work?
- Local Render Farm or Cloud Rendering: Which is Cheaper for One-Off Projects?
- The Naming Convention Mistake That Leads to « Final_Final_v3 » Confusion
- When to Lock the Edit Before Sending to Sound and Colour?
- Why a « Follow the Sun » Workflow Requires Perfect Handover Notes?
- When to Schedule Backups to Avoid Choking the Office Network?
- Frame.io vs Vimeo Review: Which Platform Speeds Up Client Sign-Offs?
Why a Bad Folder Structure Costs You 15% of Your Billable Hours?
A disorganized folder structure is not a sign of creative chaos; it is a quantifiable drain on resources. Every minute an editor, artist, or assistant spends searching for a file is a minute not spent on creative, billable work. This systemic friction accumulates, and while « 15% » might feel like a high estimate, the true cost is often hidden. In fact, recent data shows that worldwide professional services organizations achieved just over 68.9% employee billable utilization in 2023. The gap is where inefficiencies like poor asset management live.
A logical, templated folder structure is the foundation of your entire production architecture. It reduces cognitive load by making file locations predictable. Team members, from senior editors to freelance assistants, can navigate the project intuitively, find what they need instantly, and save files to the correct location without ambiguity. This isn’t about being tidy; it’s about building a system that minimizes non-billable time and protects asset integrity from day one. An effective structure uses a clear hierarchy and standardized naming that scales with project complexity.
Action Plan: Architecting Your Folder Structure
- Project Folder Root: Create the main project folder using a `YYYYMMDD_[ProjectName]` convention for chronological sorting and international clarity.
- Core Subfolders: Establish non-negotiable top-level subfolders: `01_Footage`, `02_Projects`, `03_Audio`, `04_Graphics`, `05_Exports`, `06_Docs`, `07_Archive`.
- Content Hierarchy: Within `01_Footage`, create a logical hierarchy that reflects the shoot, such as `[Date_Card#]` or `[Scene#_Shot#]`.
- Template Deployment: Create folder structure templates for different project types (e.g., commercial, documentary, social) that can be deployed instantly for new jobs.
- Documentation: Maintain a simple, one-page PDF in the project root explaining the folder structure and naming conventions for any new team member or freelancer.
How to Use Cloud Locking to Stop Editors Overwriting Each Other’s Work?
The nightmare scenario of one editor overwriting another’s work is a direct failure of the system’s collaboration layer. In a high-velocity environment with multiple editors touching the same project files, relying on manual communication (« Are you out of the project? ») is a recipe for disaster. This is where cloud file locking becomes a non-negotiable architectural component for any team-based workflow.
File locking systems prevent simultaneous write access to a single file. When one editor opens a project file, the system « locks » it, making it read-only for all other users until the first editor closes it. This simple mechanism eradicates the possibility of conflicting saves and lost work. Modern cloud storage solutions designed for media, like LucidLink or an on-premise system with this functionality, build this in, turning a potential human error into a systemic impossibility. The illustration below visualizes this principle of controlled, conflict-free access.

This approach moves your team from a state of hoping for the best to ensuring asset integrity through system design. The right platform provides this protection seamlessly, allowing editors to focus on their creative tasks without the background anxiety of data collision.
Case Study: LucidLink’s Real-Time Cloud Collaboration
Platforms like LucidLink showcase the power of a purpose-built system. By allowing teams to access and edit large media files directly from the cloud as if they were on a local drive, they eliminate the need for downloading, transferring, and syncing. Files are streamed on demand, and integrated file locking ensures that editors can work on the same media pool without ever overwriting each other’s project files. This increases data velocity and removes a major source of systemic friction for remote and co-located teams.
Local Render Farm or Cloud Rendering: Which is Cheaper for One-Off Projects?
The rendering phase is a classic bottleneck. A single complex timeline can tie up a powerful workstation for hours, grinding an editor’s progress to a halt. The architectural solution is to offload this processing to a dedicated render farm, but the choice between building a local farm and using a cloud service is a critical financial and operational decision. For studios managing one-off projects or experiencing fluctuating workloads, the math often points towards the cloud.
A local render farm requires significant upfront capital investment in hardware, plus ongoing costs for power, cooling, and maintenance. This fixed cost can be efficient if the farm is utilized continuously. However, for a one-off project with a tight deadline, this investment makes little sense. Cloud rendering services offer a « pay-as-you-go » model, providing access to immense computational power on demand with zero upfront cost. This transforms a capital expenditure (CapEx) into an operational expenditure (OpEx), directly tied to a specific project’s budget. The following comparative cost analysis breaks down the key factors.
| Factor | Local Rendering | Cloud Rendering |
|---|---|---|
| Upfront Cost | $10,000-50,000 hardware investment | Zero upfront cost |
| Ongoing Cost | Electricity, maintenance, depreciation | $0.01-0.05 per core-hour |
| Best For | Continuous small projects | Occasional large projects or deadline-driven work |
| Typical Frame Cost | Fixed after initial investment | $0.03-0.25 per frame (1080p archviz) |
Ultimately, the decision rests on your studio’s specific workload and financial model. As the Super Renders Farm team notes, there is no single right answer, only the right answer for your context.
There’s no one-size-fits-all answer. Freelancers often benefit from cloud flexibility, while busy studios might prefer local control. Consider your typical project timeline and calculate cost per project to decide.
– Super Renders Farm Team, Cloud vs Local Rendering: Complete 2024 Comparison Guide
The Naming Convention Mistake That Leads to « Final_Final_v3 » Confusion
The infamous « Final_Final_v3.mov » file is more than a running industry joke; it’s a critical failure in asset integrity and a massive source of systemic friction. When no one is certain which version is the definitive one, time is wasted opening multiple files, comparing timelines, and potentially working from an outdated cut. This chaos is the direct result of not having a clear, enforced, and universally understood naming convention.
A naming convention is a simple but powerful protocol in your production architecture. It embeds crucial metadata directly into the filename, making each asset’s purpose, version, and status immediately identifiable without needing to open it. This dramatically speeds up asset retrieval, which, according to industry observations, retrieving assets remains one of the biggest time drains for many post-production teams. A robust convention should be logical, sequential, and unambiguous.
Implementing a standard is straightforward. The key is consistency and ensuring every member of the team, including freelancers, adheres to it from day one. A simple, well-documented system is far more effective than a complex one that nobody uses. The following structure is a proven starting point:
- Standard Format: Adopt a universal format like `[ProjectCode]_[SequenceName]_[YYYYMMDD]_[Version]_[Status].ext`.
- Example: A file named `PRJ045_MainCut_20231027_v03_ForColor.prproj` tells you everything you need to know: it’s for project 045, it’s the main cut, created on Oct 27, 2023, it’s the third version, and it has been sent for colour grading.
- Status Tags: Use clear, agreed-upon status tags like `WIP` (Work in Progress), `ForReview`, `ForColor`, `ForSound`, and `FINAL`.
- Automation: Use tools within Adobe Bridge, Premiere Pro, or DaVinci Resolve to create batch-renaming presets that enforce the convention automatically.
- Cheat Sheet: Create a one-page « cheat sheet » with the naming convention rules and examples. Store it in the project’s root `Docs` folder.
When to Lock the Edit Before Sending to Sound and Colour?
Sending an unlocked edit to your sound design and colour grading teams is one of the most expensive mistakes in post-production. Every tiny change made to the picture after their work has begun—trimming a shot by a few frames, swapping a take—can cause a cascade of conforming issues, requiring hours of painstaking, non-creative work to fix. The « picture lock » is the architectural gate that prevents this. It is a formal declaration that the timeline’s structure, timing, and shot selection are final.
However, modern workflows have introduced more flexibility with concepts like a « soft lock » versus a « hard lock. » A soft lock means the main story points and sequence structure are approved, allowing sound and colour to begin preliminary work, but with the understanding that minor tweaks may still occur. A hard lock is absolute; no further changes to the edit’s timing will be made. The decision of when to declare a hard lock is a critical management choice that balances creative flexibility against budget and schedule.
To manage this complex handoff, standardized workflows are essential. For example, implementing the Academy Color Encoding System (ACES) creates a unified colour management pipeline. This ensures that from camera to final delivery, the colour data is preserved consistently, meaning the colourist is always working with the full dynamic range of the original footage, regardless of minor edit changes. This system-level approach reduces the risks associated with concurrent workflows by standardizing the data pipeline itself.
Why a « Follow the Sun » Workflow Requires Perfect Handover Notes?
A « Follow the Sun » workflow, where teams in different time zones pass a project along to achieve a 24-hour work cycle, is the ultimate test of a production architecture. When an editor in London finishes their day, they hand the project over to a colleague in Los Angeles who can immediately pick it up. This can dramatically accelerate timelines, but it only works if the handover process is flawless. Without it, the morning for the incoming editor is wasted trying to figure out what was done, what’s next, and where the files are.
The handover note is the critical API (Application Programming Interface) between your global teams. It must be a standardized, mandatory document that leaves no room for ambiguity. A verbal « I’ve uploaded the new cut » is not enough. The note must be a detailed, structured report that allows the next editor to get to work within minutes, not hours. It is the lynchpin that holds the entire global workflow together.
A perfect handover note is a system, not a memo. It should always contain the following sections:
- Summary of Work Completed: A clear list of sequences edited, effects applied, and renders completed during the shift.
- Prioritized Next Steps: An ordered task list for the incoming editor, with specific timecodes, file locations, and creative direction.
- Known Issues or Bugs: A transparent record of any render errors, missing assets, sync problems, or software glitches encountered.
- Questions and Blockers: A clear list of any items requiring client feedback or technical support that are impeding progress.
- Direct Project File Links: A link to the exact project file version (`…_v04_ForLA.prproj`) and any new assets that were ingested.
- Optional Video Walkthrough: A 2-5 minute screen recording where the outgoing editor walks through their last edits and explains any complex changes.
When to Schedule Backups to Avoid Choking the Office Network?
Backups are a non-negotiable part of any professional workflow, but an poorly implemented backup strategy can become a bottleneck itself. Initiating a full project backup in the middle of the workday can saturate your local network, slowing down everything from file transfers to internet access. This reduces your entire facility’s data velocity and frustrates every user on the network. The question isn’t *if* you should back up, but *when* and *how*.
The architectural solution is twofold: scheduling and automation. Backups of large project files and media should be scheduled for off-peak hours, typically overnight, when the network is not under load from active editorial work. This prevents backups from interfering with production. Furthermore, a robust backup strategy should follow the industry-standard 3-2-1-1-0 rule: 3 copies of your data, on 2 different media types, with 1 copy off-site, 1 copy offline (air-gapped), and 0 verification errors. Automation is key to achieving this without constant manual intervention.
Automated systems can handle not just backups, but also the initial data ingest, which is another common point of network strain. By creating automated workflows, you can ensure data is secured and organized without manual effort or prime-time network usage.
Case Study: Automating Ingest with MASV Portals
Tools like MASV Portals provide a powerful example of automating the ingest process. You can create a secure, branded upload portal for clients or field crews. When they upload large files, the system can be configured to automatically transfer those files directly into your designated cloud storage (like Amazon S3 or Dropbox) or on-premise server. This happens in the background, without choking your primary network, and ensures files land in the correct location, properly secured, from the moment they arrive.
Key Takeaways
- Pipeline design is an architectural task focused on system efficiency, not just a creative checklist.
- Every point of friction—from a bad folder name to an unscheduled backup—has a quantifiable cost in lost billable hours.
- Cloud tools are most effective when integrated into a deliberate system of file locking, versioning, and automated handovers.
Frame.io vs Vimeo Review: Which Platform Speeds Up Client Sign-Offs?
The final, and often most fraught, bottleneck in any post-production pipeline is client review and approval. Vague, un-actionable feedback delivered via email chains (« it feels a bit slow around the middle ») can lead to endless revision cycles. The architectural solution is to use a dedicated video review and approval platform that structures the feedback process, tying comments directly to specific frames and versions.
Two of the leading platforms in this space are Frame.io and Vimeo. While both allow you to share videos and collect feedback, they are designed with different core users in mind. Frame.io is built from the ground up for professional post-production teams, offering deep integrations with editing software and precise, frame-accurate annotation tools. Vimeo, while powerful, is often geared more towards marketing teams and final video hosting, with simpler review features. For a studio manager looking to accelerate sign-offs and get precise feedback, the choice of platform has a direct impact on workflow velocity. A feature-by-feature comparison reveals their distinct strengths.
| Feature | Frame.io | Vimeo |
|---|---|---|
| Frame-specific feedback | Excellent – timestamps & visual markers | Good – video annotations only |
| Version management | Superior – easy version comparison | Basic – manual version tracking |
| Adobe/FCP Integration | Direct timeline integration | Limited integration |
| Client ease of use | Some login friction reported | Simpler for non-technical clients |
| Best for | Professional post-production teams | Marketing teams & simpler reviews |
By forcing feedback to be specific, these platforms transform the review process from a subjective conversation into a clear, actionable to-do list. This precision is invaluable, as one user powerfully stated.
Can you point out specifically when and where it feels slow? This has also made me become a better producer/director because that same limitation applies to me. It forces me to only give specific and actionable feedback to my team members.
– Christopher F., Frame.io User Review on Capterra
To start building a more robust and profitable pipeline, begin by auditing your current workflow against these architectural principles. A well-designed system is not an expense; it is your single greatest competitive asset.