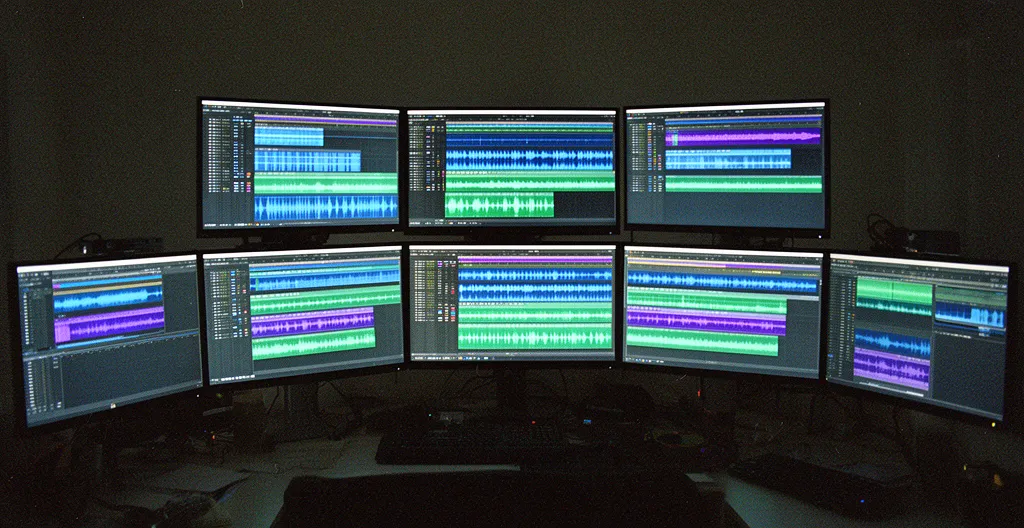
The secret to higher retention isn’t flashy transitions; it’s strategically managing your viewer’s cognitive load with seamless, invisible edits.
- Fancy effects often distract and break immersion, whereas invisible cuts can lead to a 75% improvement in emotional engagement.
- Combining visual techniques like match cuts with audio strategies like J-cuts creates a predictive flow that guides the viewer effortlessly.
Recommendation: Stop thinking about cuts as just a way to change scenes. Start treating them as a tool for controlling the video’s energy and the viewer’s attention.
You’ve spent hours perfecting your content, but the retention graph tells a brutal story: viewers are dropping off. You see other creators using dazzling transitions, complex motion graphics, and high-energy effects, and the temptation is to follow suit. The common wisdom suggests that to keep attention, you need to constantly surprise the eye with something new and exciting. But this is often a tactical mistake that addresses the symptom, not the cause.
The constant battle for watch time isn’t won with more visual noise. In fact, most of the time, the opposite is true. The most powerful editing is the editing you don’t notice. It’s a craft of psychological subtlety, not aesthetic bombardment. This isn’t about simply using a J-cut or cutting on a beat; it’s about understanding *why* these techniques work. It’s about seeing your editing timeline as a dashboard for managing your viewer’s cognitive load and emotional energy.
What if the key to making people watch longer wasn’t adding more, but strategically taking away the friction? The true art of retention lies in creating a state of flow, where each cut feels so natural and expected that the viewer’s brain doesn’t even register it as a cut. This guide will deconstruct the techniques behind this invisible art, moving beyond the « what » to explain the « why. » We will explore how to plan for seamlessness, leverage audio to guide the eye, and structure your video’s opening moments to create unstoppable viewing momentum.
To master this, we’ll break down the core tactics for making your edits invisible and your retention metrics soar. This article is structured to build your skills from the foundational concepts to advanced structural strategies.
Summary: How to Use Invisible Cuts to Keep Viewers Watching Longer
- Why Fancy Transitions Often Distract from the Message?
- How to Plan a Match Cut During Filming for Perfect Execution?
- Whip Pan vs Digital Blur: Which Looks More Organic in Fast-Paced Edits?
- The Audio Mistake That Makes Visual Transitions Feel Jarring
- When to Cut on the Beat and When to Cut on the Lyrics?
- How to Place the Hook Before the Intro Sequence?
- Why Do 60% of Viewers Abandon Your Sales Video Before the Call to Action?
- Why Long Intros Kill Retention: The 3-Second Rule for Modern Brands?
Why Fancy Transitions Often Distract from the Message?
The core job of an editor is to maintain the viewer’s immersion. Every edit decision should serve the story or the message, not the editor’s desire to show off their new plugin pack. A flashy, unmotivated transition acts as a pattern interrupt, but not in a good way. It pulls the viewer out of the content and forces them to notice the editing itself. This increases their cognitive load—the mental effort required to process what’s happening—and breaks the emotional connection you’ve worked so hard to build.
Think of it as a conversation. A seamless cut is like a smooth, logical continuation of a thought. A flashy transition is like someone suddenly shouting a random word; it’s jarring, confusing, and makes you lose your train of thought. While there’s a time and place for deliberate, stylized transitions (like signaling a major shift in time or location), using them as a default is a retention killer. The goal is to make the viewer forget they are watching an edited video.
The data backs this up. It’s not just a theoretical preference; it has a measurable impact on how viewers connect with the content. In fact, research from Frontiers in Psychology demonstrates a 75% improvement in emotional immersion when audiences are shown content with invisible cuts compared to those with overt, complex transitions. When the cut is invisible, the brain doesn’t have to work to bridge the gap between two scenes, allowing it to stay fully engaged with the narrative and the emotion of the moment. This is the foundation of high-retention editing.
How to Plan a Match Cut During Filming for Perfect Execution?
A match cut is one of the most powerful invisible edits in your arsenal. It connects two different scenes by matching the action, shape, or composition of the shots. A character throwing a bone in one scene cuts to a spaceship of a similar shape floating in the next. The effect is seamless and intellectually satisfying. However, the best match cuts are almost never happy accidents in the edit bay; they are meticulously planned during pre-production and filming.
To execute one perfectly, you need to think like a director. First, identify the connecting element: will it be a shared color, a similar object shape, or a continuous motion? Storyboard both shots—the outgoing shot (A) and the incoming shot (B)—to visualize the alignment. During filming, communicate with your camera operator to ensure the framing of both shots is deliberate. If you’re matching on action, have the actor perform the motion multiple times to give you options. Use on-set markers if needed to ensure objects are in the correct position.
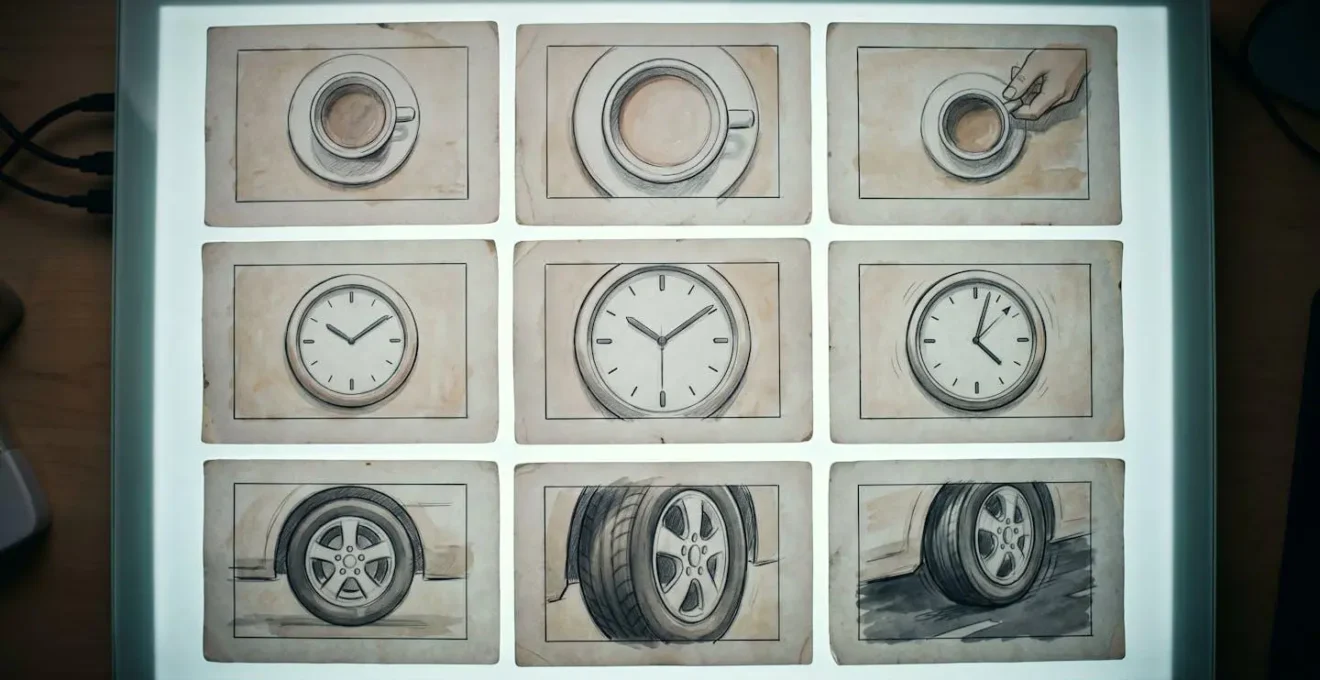
This level of foresight transforms the editing process from a salvage operation into a final assembly. It’s the difference between hoping two shots work together and knowing they will. This principle was famously taken to the extreme in modern cinema.
Case Study: Birdman’s Invisible Cut Methodology
To create the illusion of a single, continuous take, Alejandro G. Iñárritu’s film ‘Birdman’ is a masterclass in planned invisible cuts. The team didn’t rely on digital morphing alone. Instead, they used pre-planned camera occlusion techniques. As detailed in a Videomaker analysis of the technique, actors would strategically move in front of the lens at predetermined moments, or the camera would pan quickly past a pillar. These moments of visual obstruction were the hidden windows where the editor could seamlessly cut to the beginning of the next long take, with positions marked on set to ensure perfect alignment.
Whip Pan vs Digital Blur: Which Looks More Organic in Fast-Paced Edits?
When you need to convey high energy or a rapid change of subject, a simple cut can feel too slow. This is where motion-based transitions come in. The two most common tactics are the whip pan (a very fast camera pan that blurs the image) and the digital blur (a directional blur effect applied in post-production). While they achieve a similar goal, they send very different signals to the viewer and have distinct impacts on how « organic » the edit feels.
A whip pan, whether done in-camera or simulated, creates a raw, chaotic energy. It feels authentic and visceral, as if the camera operator is physically struggling to keep up with the action. This makes it perfect for fast-paced, user-generated-style content on platforms like TikTok or Instagram Reels, where a polished look can sometimes feel out of place. It screams « in the moment. »
A digital blur transition, on the other hand, feels more controlled and polished. It’s smooth, clean, and intentional. While it also conveys speed, the energy is more refined and less chaotic. This makes it an excellent choice for corporate videos, YouTube explainers, or brand content on LinkedIn, where professionalism and clarity are paramount. It says « high production value. » The choice isn’t about which is better, but which best serves the content’s tone and the platform’s expectations.
This table breaks down the strategic decision-making process. As shown in this comparison of creative editing techniques, the right choice depends entirely on your intended viewer perception.
| Technique | Energy Level | Best Platform | Viewer Perception | Production Cost |
|---|---|---|---|---|
| Whip Pan | 10/10 (Chaotic) | TikTok, Instagram Reels | Raw, Authentic | Low (In-camera) |
| Digital Blur | 7/10 (Controlled) | YouTube, LinkedIn | Polished, Professional | Medium (Post-production) |
| Simple Cut | 4/10 (Standard) | All Platforms | Neutral, Clean | Minimal |
The Audio Mistake That Makes Visual Transitions Feel Jarring
Many editors focus so intensely on the visual cut that they forget the most powerful tool for making it invisible: audio. The single biggest audio mistake is the hard cut, where both the video and audio from scene A cut to scene B at the exact same frame. Visually, the scene changes, and aurally, the soundscape abruptly shifts. This simultaneous change doubles the cognitive load on the viewer, making the transition feel clunky and jarring, no matter how clean the visual edit is.
The solution is to decouple your audio and video edits using J-cuts and L-cuts. A J-cut is when the audio from the upcoming scene (B) starts *before* the video cuts to it. An L-cut is the opposite, where the audio from the previous scene (A) continues to play *after* the video has cut to scene B. These techniques create an audio bridge that guides the viewer’s brain across the visual gap. Hearing what’s next before you see it is a form of « predictive audio, » which primes the brain for the change and makes the transition feel seamless and natural.

This isn’t just theory; it has a direct, measurable impact on viewer retention. By leading with sound, you create a continuous flow of information that prevents the viewer from ever feeling disoriented.
Case Study: J-Cut Implementation in Corporate Videos
A case study from ActionVFX showed that a corporate video production studio transformed its testimonial videos by implementing J-cuts. They found that hearing the next speaker’s voice for a second before seeing them on screen created a much more fluid and engaging narrative. The result was a quantifiable 15% reduction in viewer drop-off at scene transitions, proving that this simple audio technique is a powerful tool for maintaining viewer momentum.
When to Cut on the Beat and When to Cut on the Lyrics?
Editing to music is a fundamental skill, but the common advice to « cut on the beat » is an oversimplification. The beat provides the energy, but the lyrics provide the emotion and the narrative. A master editor knows when to use each to control the viewer’s experience. Cutting on the beat (typically the kick or snare drum) drives pace and creates a sense of kinetic energy. It’s a physical, primal rhythm that works perfectly for action sequences, energetic montages, B-roll sequences, and product reveals.
Cutting on the lyrics, however, is a more emotional and intellectual choice. You are aligning the visual change with a specific word or phrase to create or emphasize meaning. This technique is ideal for storytelling segments, emotional moments, or testimonial videos where you want the viewer to connect a specific visual with a specific idea. For example, cutting to a shot of a happy customer at the exact moment the singer says the word « relief. »
Knowing when to follow these rules—and when to break them—is key. An intentional cut *off-beat* can create a feeling of unease, tension, or disruption, which can be a powerful storytelling tool in itself. Synchronizing these pattern interrupts with the music is a proven retention strategy. In fact, a YouTube retention analysis by Backlinko found that well-placed visual changes synchronized with music increased retention by 18%. This demonstrates that rhythmic editing is not just for style, but is a core driver of engagement.
Your Music-Driven Editing Playbook
- Cut on the Beat For: Use the driving rhythm for action sequences, montages, product reveals, and high-energy tutorials to maximize pace.
- Cut on the Lyrics For: Align cuts with key words during emotional moments, narrative points, and testimonials to emphasize meaning.
- Assess for Coherence: Ensure the mood of the music (major vs. minor key, tempo) matches the emotional intent of the scene.
- Break the Rule Intentionally: Cut off-beat or against the lyrical phrase to create tension, unease, or to signal a disruption in a character’s mental state.
- Check the Flow: Play the sequence back with your eyes closed. If the audio edits feel right, the visual edits have a strong foundation.
How to Place the Hook Before the Intro Sequence?
The first few seconds of your video are the most valuable real estate you have. Too many creators waste them on a lengthy, self-indulgent branding sequence or intro. By the time the logo has finished animating, a significant portion of the audience has already clicked away. The modern retention strategy is to deliver the hook first and the branding second (or not at all).
A hook is a micro-summary of the video’s core promise or a question that sparks immediate curiosity. It should answer the viewer’s unspoken question: « Why should I watch this? » You must provide that answer before you ask them to sit through your intro. This means the very first thing they see and hear is the most exciting, intriguing, or valuable part of the entire video. Show the finished product before the tutorial, state the controversial opinion before you defend it, or present the dramatic « after » before the « before. »
Only after you have secured their attention with a powerful hook can you then roll your brief intro sequence. This re-orders the traditional video structure from [Intro -> Content] to [Hook -> Intro -> Content]. This simple change is one of the most effective retention tactics on platforms like YouTube.
Case Study: MrBeast’s 3-Second Hook Strategy
MrBeast is a master of this technique. His video ‘Feeding A Dog $1 vs $10,000 Steak’ doesn’t start with a logo. It starts immediately with him on screen, presenting the premise. Within the first three seconds, he has established the core conflict (two steaks of vastly different values) and created intense curiosity (which one will the dog choose?). This immediate delivery of the value proposition is a key reason his videos achieve industry-leading retention rates. He earns the viewer’s attention before asking for it.
Why Do 60% of Viewers Abandon Your Sales Video Before the Call to Action?
In a sales or marketing video, the entire goal is to get the viewer to the call to action (CTA). Yet, retention graphs for this type of content often look like a steep cliff. The initial hook gets them in, but their attention wanes long before the final pitch. Why? Because most sales videos fail to manage persuasive momentum. They treat the video as a single argument, when it should be a series of « mini-hooks. »
Viewers abandon the video because their initial curiosity is satisfied and no new questions are raised to carry them forward. The editor’s job is to prevent this attention decay. You need to analyze your YouTube Analytics retention graph to find the exact point where the average viewer drops off. This is your « red zone. » Your mission is to deploy a re-engagement tactic about 10 seconds *before* this point.
This can be a strong pattern interrupt: a sudden change in location, a bold text overlay asking a direct question, or a shift in music. For sales videos specifically, this is the perfect time to introduce a testimonial. Use a J-cut to bring in the customer’s voice before you even see them, creating a seamless transition from a product feature to social proof. By strategically inserting these « re-hook » moments every 30-60 seconds, you create a chain of curiosity that pulls the viewer all the way to the CTA.
Key takeaways
- Great editing is invisible; it manages the viewer’s cognitive load rather than showing off technical skill.
- Plan your cuts during filming. Techniques like match cuts are born in pre-production, not just in the edit bay.
- Audio is half the battle. Use J-cuts and L-cuts to create an ‘audio bridge’ that makes visual transitions feel seamless.
Why Long Intros Kill Retention: The 3-Second Rule for Modern Brands?
In the digital attention economy, you don’t have 30 seconds to make an impression. You have three. The « 3-Second Rule » is a critical guideline for modern brands and creators: you must establish value and create curiosity within the first three seconds of your video. Any longer, and you’re bleeding viewers. As we’ve seen, this is why the hook must come before the intro. A long, unearned intro is a sign of disrespect for the viewer’s time.
This principle is backed by hard data. An analysis from Views4You confirms that videos delivering a clear hook within the first 15 seconds consistently perform better, showing an 18% higher 1-minute retention rate than those with slow starts. The first few seconds set a contract with the viewer. A fast, value-packed opening promises an efficient and rewarding experience. A slow, branded opening signals a self-serving video, prompting an immediate exit.
However, this rule is not without its exceptions. This is where understanding brand trust comes into play. A new or growing channel has zero brand trust; it must earn every second of a viewer’s time. Therefore, the 3-second rule is absolute. But for established, highly-trusted brands, the rules are different.
Case Study: The Brand Trust Exception
Established brands with massive, loyal followings like Apple or tech reviewer MKBHD can get away with longer intros, sometimes extending to 10-15 seconds. Their name alone is the hook. Viewers have been conditioned to know that the content to follow will be of exceptional quality, so they are willing to wait. An analysis from Influence Marketing Hub highlighted this by noting that when new channels tried to copy this « prestige intro » format, they saw a staggering 60% viewer drop-off in the first 30 seconds. This proves the 3-second rule is a vital tactic for growth, while a longer intro is a privilege that must be earned.
By shifting your mindset from « what looks cool? » to « what feels seamless? », you transform your role from a technician to a master of pace and flow. Every cut, every audio transition, every structural choice becomes a deliberate tactic to manage viewer energy and maximize immersion. This is how you stop chasing fleeting attention and start earning dedicated watch time.