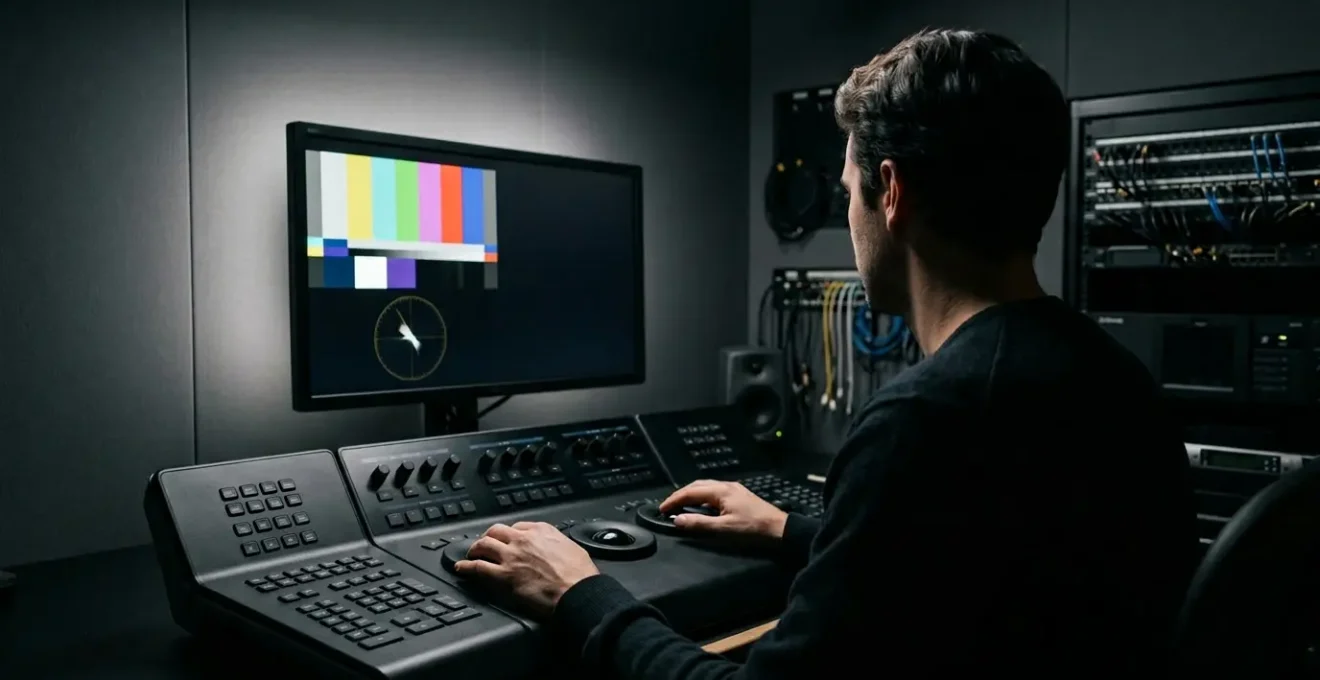
Passing Clearcast QC isn’t a final-step fix; it’s a discipline of maintaining signal integrity from ingest to delivery, treating the technical specification as the foundational grammar of your grade.
- Illegal colours are a function of the limited Rec. 709 gamut, not a flaw in your creative vision.
- Your grading environment—from bias lighting to monitor calibration—is as critical as your software for ensuring technical compliance.
Recommendation: Shift your mindset from ‘fixing for broadcast’ to ‘building for broadcast’ from the very first node of your colour grade.
The email arrives with a subject line that every post-production supervisor dreads: « QC Rejection ». Your beautifully crafted TV spot, the one that looked perfect in the suite, has been flagged for illegal luminance or gamut excursions. Now the clock is ticking, the airdate is looming, and you’re scrambling to diagnose a problem that wasn’t visible to the naked eye. The common advice is to simply apply a ‘broadcast safe’ filter in your NLE or grading software, a blunt instrument that often desaturates the image and compromises the original creative intent.
But this reactive approach is precisely why so many ads fail. Relying on a last-minute filter is like proofreading a novel by only checking the last page. True compliance, the kind that gets you a first-time pass from Clearcast, is not a final-step fix. It is a philosophy, a discipline of maintaining signal chain integrity from the moment the Log footage is ingested to the final AS-11 export. It requires understanding the ‘why’ behind the rules, not just the ‘what’.
The key is to reframe the technical specification. It is not a creative straitjacket; it is the technical grammar of the broadcast medium. Just as grammatical rules give structure and clarity to language, technical standards ensure your visual message is delivered to millions of television sets without distortion, bleeding, or flicker. This guide moves beyond simplistic fixes to provide a senior colourist’s perspective on building a robust, compliant workflow. We will dissect the entire process, from grading fundamentals to the nuances of file delivery, to equip you with the strategy needed to pass QC with confidence, every time.
This article provides a detailed workflow for ensuring your television commercials meet the stringent technical requirements of UK broadcasters. Explore the sections below to master each critical stage of the process.
Contents: Mastering UK Broadcast Delivery Standards
- Why Are Illegal Colours Rejected by UK Broadcasters Even If They Look Good?
- How to Grade Log Footage for Broadcast Without Introducing Digital Noise?
- DaVinci Resolve vs Baselight: Which System Justifies the Cost for Boutique Studios?
- The Skin Tone Mistake That Makes High-End Interviews Look Like Amateur Footage
- How to Set Up a Bias Lighting Environment for Accurate Colour Perception?
- AS-11 vs DPP: Which File Format Does Your UK Broadcaster Require?
- The Saturation Mistake That Makes Your Red Logo Bleed on TV
- How to Export Master Files for UK TV Without Failing Quality Control?
Why Are Illegal Colours Rejected by UK Broadcasters Even If They Look Good?
The core of the issue lies in the fundamental difference between human perception and technical limitation. A vibrant, saturated red that looks stunning on a modern OLED grading monitor can become a bleeding, noisy mess on a consumer television. This is not a failure of your creative eye, but a direct consequence of the broadcast standard’s container: Rec. 709. The reality is that the Rec. 709 broadcast standard only covers 35.9% of the CIE 1931 colour space that the human eye can perceive. Your grade might contain beautiful colours that simply have no place to go within this limited gamut.
When a signal contains colour or luminance values outside the legal limits (typically 0-100 IRE for luminance in the UK), it’s considered ‘illegal’. Broadcasters reject this for several critical reasons. Firstly, out-of-gamut colours can cause ‘bleeding’, where a highly saturated colour spills into adjacent areas of the picture. Secondly, illegal luminance levels can cause clipping in the highlights (loss of detail in bright areas) or crushing in the blacks (loss of detail in dark areas). Most critically, these illegal signals can interfere with transmission equipment, potentially affecting other channels or causing broadcast outages. The QC process is therefore a technical necessity to protect the integrity of the entire broadcast infrastructure.
Understanding this distinction is the first step. Your job as a colourist or supervisor is to translate the creative vision into the specific ‘language’ of Rec. 709. This means using your tools—waveform monitors, vectorscopes, and gamut legalisers—not to ‘dumb down’ the image, but to find the most effective and vibrant representation of your intended look within the technical grammar of the broadcast standard. It’s an act of translation, not censorship.
How to Grade Log Footage for Broadcast Without Introducing Digital Noise?
Logarithmic (Log) footage is the standard for professional acquisition, offering maximum dynamic range and flexibility in the grade. However, this flexibility comes with a risk: improper handling can introduce or exacerbate digital noise, particularly in the shadows. When you take the flat, low-contrast Log image and expand it into the full Rec. 709 range, you are stretching the data. If the footage was even slightly underexposed, this ‘stretching’ process will pull up the noise floor, turning clean shadows into a distracting, « crawling » mess that is an instant QC fail.
The key to a clean grade is a robust node structure and precise order of operations, a core part of maintaining signal chain integrity. The first step should always be a clean, technical transformation from the camera’s specific Log space (e.g., Arri LogC, Sony S-Log3) to your working colour space (e.g., DaVinci Wide Gamut). Using a manufacturer’s official LUT or a Colour Space Transform (CST) tool is non-negotiable here. Do not attempt to ‘grade’ the Log image manually with lift/gamma/gain controls as your primary transform; this is the fastest way to break the image and introduce artifacts.
Once the technical transform is applied, your creative grading begins. It’s crucial to apply noise reduction early in the node tree, but *after* the CST. This ensures the noise reduction algorithm is working on a normalised image, making it more effective at distinguishing between fine detail and unwanted noise. Be subtle with noise reduction; overly aggressive settings can create a plastic, artificial look and soften the image too much. The goal is to gently suppress the noise in the shadows without sacrificing critical texture and detail elsewhere in the frame.
DaVinci Resolve vs Baselight: Which System Justifies the Cost for Boutique Studios?
For a Manchester-based boutique post-production house, the choice of grading system is a significant financial and operational decision. The two dominant players, Blackmagic’s DaVinci Resolve Studio and FilmLight’s Baselight, both offer robust toolsets capable of producing compliant, high-end results. However, they represent vastly different philosophies and investment levels. DaVinci Resolve Studio has democratised high-end colour grading with its aggressive one-time pricing, while Baselight remains the premium, subscription-based choice for many top-tier facilities.
The decision often comes down to workflow automation and the cost of potential user error. Baselight’s core strength lies in its deeply integrated, colour-managed framework. Its Truelight system and automated workflows for different delivery standards (including AS-11 DPP) minimise the risk of technical non-compliance. For a facility handling high volumes of broadcast work, this ‘guaranteed compliance’ can justify the high annual cost by saving significant time and money on QC rejections. It enforces the technical grammar of broadcast from the ground up.
Conversely, DaVinci Resolve offers immense power but places more responsibility on the colourist. While it has excellent built-in broadcast safe tools and scopes, setting up a fully compliant project requires manual configuration of colour management, timeline settings, and export parameters. For a smaller studio, the low entry cost of Resolve is incredibly attractive, but this must be balanced against the investment in senior talent and rigorous internal QC processes required to prevent costly mistakes. For a boutique studio, Resolve is often the pragmatic choice, provided there is a deep in-house understanding of signal flow and a non-negotiable, multi-step verification process before any master file is delivered.
This table breaks down the key differences and their impact on achieving compliance for a boutique UK studio.
| Feature | DaVinci Resolve Studio | Baselight | Impact on Compliance |
|---|---|---|---|
| Entry Cost | $295 one-time | $15,000+ annual | Budget allocation for additional QC tools |
| Built-in Broadcast Safe | Yes, with visual exceptions | Yes, with Truelight system | Both meet UK standards |
| Rec.709 Management | Manual setup required | Automated workflows | Risk of user error vs guaranteed compliance |
| AS-11 Export | Via third-party plugins | Native support | Additional verification needed for Resolve |
| Learning Curve | 3-6 months | 6-12 months | Time to reliable delivery |
The Skin Tone Mistake That Makes High-End Interviews Look Like Amateur Footage
Nothing screams ‘amateur’ faster than inconsistent or unnatural skin tones. In high-end interviews, where the human face is the primary subject, getting skin tones right is paramount. The most common mistake is not a grading error, but an environmental one: grading under lighting that is not a true, spectrally accurate representation of the D65 standard illuminant. Many supervisors and colourists believe that any light source with a Correlated Colour Temperature (CCT) of 6500K is sufficient for bias lighting or ambient room light. This is a critical misunderstanding.

As industry experts point out, the colour temperature number alone is misleading. According to the MediaLight Technical Documentation’s D65 vs. 6500K Color Temperature Analysis:
6500K and D65 are related, but they are not the same thing. A 6500K light can visually resemble daylight, but the way it produces that appearance can vary drastically depending on the LEDs or phosphors used.
– MediaLight Technical Documentation
A cheap LED strip might achieve a 6500K CCT but have significant spikes and troughs in its spectral power distribution, particularly in the green and magenta wavelengths. Your eyes and brain will partially compensate for this, but your monitor and your grade will not. You may unknowingly add magenta to your image to counteract a green spike in your ambient lighting, resulting in skin tones that look perfect in your suite but appear sickly and green on a calibrated broadcast monitor. To avoid this, environment as a tool becomes a key concept. Professional colour grading requires lighting with a Color Rendering Index (CRI) of 95 or higher to accurately reproduce the full spectrum of light, which is essential for judging skin tones correctly. The line on a vectorscope representing the skin tone axis is not a suggestion; it’s a physiological constant, and your viewing environment must be accurate enough to allow you to place your skin tones on that line with confidence.
How to Set Up a Bias Lighting Environment for Accurate Colour Perception?
Your perception of colour is not absolute; it is relative to the environment in which you view it. A properly configured grading suite with correct bias lighting and neutral surroundings is not a luxury—it is a mandatory professional tool for making accurate and repeatable colour decisions. The goal is to create a ‘perceptual anchor’ that allows your eyes to adapt to a neutral reference point, reducing eye strain and preventing you from misinterpreting the colours on your calibrated monitor. An incorrect viewing environment is a primary cause of QC rejections, as it directly leads to grades that are too dark, too bright, or have a significant colour cast.
The cornerstone of this environment is bias lighting: a neutral light source placed behind your monitor. Its purpose is to provide a reference white for your eyes that is less bright than the monitor’s peak white. This helps your irises remain in a more consistent state, improving your ability to judge shadow detail and perceive a consistent black level. The international standard for this is D65, a precise definition of daylight at 6500K. As discussed previously, simply using a 6500K CCT light is insufficient. You must use a D65-certified light source with a high CRI (Colour Rendering Index) to ensure spectral uniformity. The surrounding walls must also be a neutral grey (typically N5 or N7 on the Munsell scale) to avoid colour reflections that would contaminate your perception.
Setting up this environment is a technical process. The brightness of the bias light should be no more than 10% of your monitor’s peak luminance, and all other light sources in the room should be extinguished. Even the light from a control surface or keyboard can be a source of contamination. Mastering your environment as a tool is as crucial as mastering your grading software. It’s the only way to guarantee that what you see in the suite is what will be seen on millions of screens across the country.
AS-11 vs DPP: Which File Format Does Your UK Broadcaster Require?
Navigating file formats and delivery specifications can be a source of significant confusion and QC failures. In the UK broadcast landscape, you will frequently encounter the terms ‘AS-11’ and ‘DPP’. It’s crucial to understand that they are not competing formats but related components of a single standard. The AS-11 is a vendor-neutral file format specification developed by the Advanced Media Workflow Association (AMWA). Think of it as the container, defining the ‘shape’ of the file.
The Digital Production Partnership (DPP), a collaboration between UK broadcasters like BBC, ITV, and Channel 4, then created a specific ‘flavour’ or application of this AS-11 standard tailored for the UK. This is what is meant by the ‘AS-11 UK DPP’ specification. It dictates not just the file wrapper (MXF OP1a) and codecs (e.g., AVC-Intra 100 for HD), but also a highly specific set of embedded metadata. In fact, incorrect or incomplete metadata is one of the most common reasons for delivery rejection.
Since the watershed moment for UK broadcast, the standard has been clear. As confirmed by the DPP, since October 1st, 2014, all major UK broadcasters have required the AS-11 DPP file format for programme and commercial delivery. While the core specification is unified, individual broadcasters may have slight variations or additional requirements, particularly concerning metadata fields or the placement of clocks and bars. It is absolutely imperative to obtain and meticulously follow the most recent delivery specification document from the specific broadcaster you are delivering to. The DPP standard provides the foundation, but the broadcaster’s spec sheet is your ultimate guide for that specific delivery.
The Saturation Mistake That Makes Your Red Logo Bleed on TV
The ‘bleeding red’ is a classic broadcast problem. A brand’s iconic, highly saturated red logo looks sharp and punchy in the design files but appears fuzzy, soft, and spills over its edges on a TV screen. This is a direct result of exceeding the gamut and luminance limits of the Rec. 709 broadcast standard, a phenomenon known as ‘chroma subsampling artifacting’. Essentially, the television system has more information for brightness (luma) than it does for colour (chroma). When a colour is too intense, the system struggles to contain it within its designated boundaries, causing the bleed.
This is a particularly sensitive issue for advertisers, as brand colour accuracy is paramount. Clearcast, the body that clears ads for UK broadcast, is not there to « ban » ads but to ensure they are compliant with both advertising regulations and technical standards. As their official documentation states, their role is collaborative.
We work with agencies to get ads that comply with the rules on TV and VoD. We don’t ‘ban’ commercials – we help make them compliant.
– Clearcast Official Documentation, TV Ad Clearance & Regulation Guidelines
Fixing a bleeding logo or graphic requires a surgical approach, not a sledgehammer. Simply applying a blanket ‘broadcast safe’ filter will desaturate the entire image, compromising the look of the live-action footage. The correct method is to isolate the problematic graphic or colour using a secondary qualification or a matte in your grading software. Once isolated, you can use hue vs. saturation curves to precisely reduce the saturation of only that specific red hue until it falls within legal limits on a vectorscope. You can also slightly reduce its luminance. This targeted approach preserves the integrity of the rest of the image while ensuring the logo is technically compliant and remains as vibrant as possible within the technical grammar of broadcast.
Key takeaways
- Treat the technical specification as the grammar of your grade, not as a creative limitation. Build compliance in, don’t try to fix it at the end.
- Your viewing environment is a critical tool. Inaccurate bias lighting or non-neutral walls will directly lead to a flawed grade and a QC rejection.
- Mastering delivery is more than the picture. Meticulous AS-11 metadata and strict adherence to EBU R128 audio standards are non-negotiable for a first-time pass.
How to Export Master Files for UK TV Without Failing Quality Control?
The final export is the culmination of all your work. Getting it wrong at this stage is a frustrating and entirely avoidable error. A successful delivery is about more than just a visually perfect and technically legal picture; it is a complete package that must adhere precisely to the broadcaster’s specification. The typical Clearcast approval time of two to three weeks for UK TV commercials means there is little room for error caused by a failed QC on the master file. Your goal is to deliver a file that can be ingested into the broadcast playout system automatically, without any human intervention or flags.
This means your file must have the correct wrapper (MXF), codec (e.g., AVC-Intra Class 100), frame rate, and resolution. But critically, it must also contain perfectly formatted AS-11 metadata, pass an automated PSE (Photosensitive Epilepsy) test, and have audio mixed to the strict EBU R128 loudness standard. A file can be rejected for a single incorrect character in a metadata field or for audio that is just 0.1 LUFS over the limit. There is no margin for « close enough. »
This is where proactive monitoring and checklists become invaluable. Before you even begin the export, you must run a full pass through an Automated Quality Control (AQC) system like Interra Baton or Tektronix Aurora. These systems simulate the broadcaster’s own ingest QC and will provide a detailed report flagging any and all errors, from illegal luminance flashes lasting a single frame to incorrect audio track layouts. Treating the AQC report as your final exam is the best way to guarantee a first-time pass. Do not deliver a file until it has passed your internal AQC with zero errors.
Your pre-export quality control checklist
- Run automated PSE (Photosensitive Epilepsy) test and ensure the report is included with the delivery.
- Verify all AS-11 metadata fields meticulously, cross-referencing them against the specific broadcaster’s requirement sheet.
- Check that all audio tracks comply with EBU R128 loudness specifications (-23 LUFS integrated loudness).
- Confirm the video codec is correct for the delivery standard (e.g., AVC Intra Class 100 for HD).
- Generate and thoroughly review a final AQC (Automated Quality Control) report, addressing every flagged issue.
To secure your next delivery and eliminate the stress of QC rejections, begin by auditing your current workflow against these technical benchmarks. A disciplined, proactive approach is the only sustainable path to first-time approval.
Frequently asked questions about How to Pass Clearcast Technical Standards for UK TV Spots on the First Try?
Is AS-11 the same as DPP?
No, they are related but distinct. The DPP (Digital Production Partnership) is a UK-based organisation that created a specific delivery specification for UK broadcasters. This specification uses the AS-11 file standard, which was developed by the AMWA (Advanced Media Workflow Association), as its foundation. Think of AS-11 as the container and the DPP specification as the precise set of rules for what must go inside that container for UK delivery.
Which metadata fields cause the most rejections?
While any error can cause a rejection, fields related to programme editorial and technical information are common culprits. The AS-11 specification mandates a minimum set of metadata based on the EBU Core standard. Errors in fields like ‘Programme Title’, ‘Episode Number’, or technical details like ‘Audio Loudness Standard’ must be filled out exactly as required by the broadcaster’s spec sheet, as automated systems will reject the file based on even minor discrepancies.
Do all UK broadcasters use the same AS-11 specification?
Mostly, yes. The vast majority of UK broadcasters have based their delivery requirements on the unified AMWA AS-11 UK DPP specification. This has greatly standardised the delivery process. However, you must always assume that each broadcaster may have its own specific additional requirements, particularly concerning unique metadata fields or the precise layout of the file. Always obtain and consult the latest delivery specification document directly from the destination broadcaster before exporting your final master.