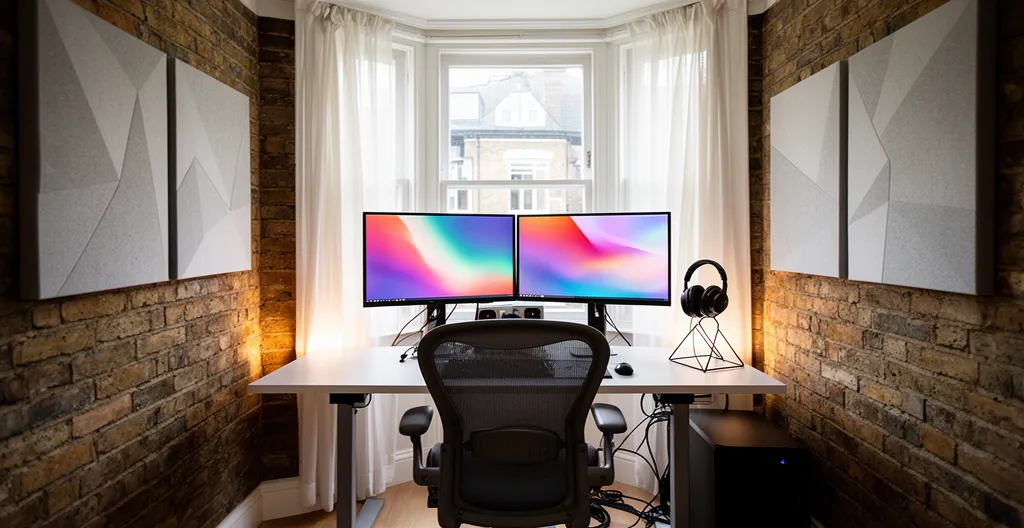
In summary:
- Building a 4K edit suite on a budget is a game of eliminating hidden bottlenecks, not just buying the most powerful PC.
- Save a significant portion of your £3k budget by purchasing professionally refurbished, top-tier ergonomic gear from specialist London suppliers.
- Your monitor choice should be dictated by your desk’s physical space and your primary workflow (timeline vs. multi-app), not just screen size.
- For 4K cloud workflows in London, prioritise an ISP with high symmetrical upload speeds, as this is the most common productivity killer.
- Professional file organisation isn’t optional; it’s a direct recovery of billable hours lost to searching for media.
Moving from a bustling co-working space to a dedicated home studio is a major step for any freelance editor in London. The freedom is exhilarating, but the reality of a tight budget—let’s say £3,000—and an even tighter floor plan can be daunting. The internet is flooded with advice to pour all your cash into the CPU and GPU. While they are critical, this common wisdom overlooks the hidden drains on your productivity and profitability: the ergonomic tax of a bad chair, the chaos of a poor folder structure, and the crippling wait for a 4K file to upload on a standard broadband connection.
The true challenge isn’t just building a powerful computer; it’s architecting a complete, high-performance ecosystem within strict financial and spatial constraints. The key isn’t simply spending money, but spending it with surgical precision. What if the secret to a fast and profitable 4K suite wasn’t maxing out your processor, but rather investing in the often-ignored components of your digital and physical workflow? This is a game of bottleneck hunting, where a £400 refurbished chair can provide a greater return on investment than a slightly faster graphics card by preventing RSI and keeping you comfortably in the zone for longer.
This guide moves beyond generic PC-building advice. We’ll deconstruct the entire editing environment, from your spine’s health to your digital supply chain. We will analyse the specific hardware trade-offs you’ll face, explore London-centric solutions for sourcing gear and connectivity, and provide a practical framework to build a truly professional 4K editing suite that respects both your craft and your bank account.
This article breaks down the essential, often-overlooked components for building an efficient and budget-conscious 4K editing suite in a compact London space. The following sections will guide you through the critical decisions that have the biggest impact on your daily workflow and profitability.
Summary: A Freelancer’s Guide to Building a Budget 4K Edit Suite
- Why Your Chair is Causing RSI and Slowing Down Your Editing Speed?
- How to Allocate RAM in Premiere Pro to Stop Playback Lag?
- Dual Monitor vs Ultrawide: Which Setup Boosts Timeline Efficiency?
- The Speaker Placement Error That Ruins Your Audio Mix on Other Devices
- When to Upgrade Your GPU: Signs Your Graphics Card is Bottlenecking Your Render
- Why a Bad Folder Structure Costs You 15% of Your Billable Hours?
- Broadband or Leased Line: Is the Dedicated Speed Worth the Cost?
- Is Your Office Internet Fast Enough for 4K Cloud Editing Workflows?
Why Your Chair Is Causing RSI and Slowing Down Your Editing Speed?
When you’re staring down a £3,000 total budget, spending a significant chunk on a chair seems like a luxury. This is a critical error. A cheap, unsupportive chair imposes an « ergonomic tax » on your business. It doesn’t just cause back pain; it directly slows you down. Repetitive Strain Injury (RSI) and general discomfort lead to more frequent, unscheduled breaks and a loss of focus that can slash your editing speed. You’re not just buying a chair; you’re investing in billable hours.
The solution isn’t to blow a third of your budget on a brand-new Herman Miller Aeron. The strategic compromise for a London-based freelancer is the refurbished market. This is where you practice smart bottleneck hunting. Why let physical discomfort be your primary bottleneck when you can get elite-level ergonomics for the price of a mid-range graphics card? Companies specialising in office clearances offer professionally refurbished, high-end chairs at a fraction of their retail price. For instance, London-based suppliers like Andrews Office Furniture provide access to models like the Herman Miller Aeron and Mirra, often with next-day delivery within the M25.
This approach delivers an exceptional return on « Productivity per Pound. » An analysis of the market shows that refurbished Herman Miller and Steelcase chairs cost 30% to 75% less than retail, allowing you to acquire a chair designed for 8+ hours of daily use for around £400-£600. This single purchase protects your physical health, extends your productive working sessions, and keeps you well within your overall budget. It’s one of the smartest, most profitable investments you can make in your new studio.
How to Allocate RAM in Premiere Pro to Stop Playback Lag?
Playback lag is the enemy of creative flow. When you hit the spacebar to review a 4K timeline layered with effects and color grades, you need it to play smoothly. More often than not, insufficient or poorly allocated RAM is the culprit. For 4K editing, 32GB of RAM is widely considered the baseline, but the moment you introduce motion graphics from After Effects via Dynamic Link or run multiple applications, you’ll feel the pinch. The question isn’t just « how much RAM, » but « how much RAM for my specific workflow? »
For a freelancer on a budget, 64GB can feel like an over-investment, but the performance gains are tangible. According to extensive testing, upgrading from 32GB to 64GB RAM reduces 4K render times by up to 15%. This time saving translates directly into faster client deliveries and more capacity for new projects. However, simply having the RAM isn’t enough; you must tell your software how to use it. In Adobe Premiere Pro, navigate to `Edit > Preferences > Memory`. By default, Premiere reserves a portion of RAM for other applications. For a dedicated editing machine, you can be aggressive here. Lowering the « RAM reserved for other applications » to the minimum (e.g., 4-6GB) gives Premiere maximum headroom for caching frames, resulting in smoother timeline scrubbing and real-time playback.
The choice between 32GB and 64GB depends entirely on the complexity of your projects. If you’re primarily cutting single-stream 4K ProRes, 32GB will suffice. If your work involves multi-cam sequences, heavy effects, or a workflow that jumps between Premiere, After Effects, and Photoshop, 64GB is a necessary investment to prevent your system from becoming a bottleneck.
This table breaks down how RAM impacts different 4K editing scenarios, helping you decide where to allocate your budget.
| Workflow Type | 32GB RAM Performance | 64GB RAM Performance | Best For |
|---|---|---|---|
| 4K ProRes Editing | Good for single stream | Smooth multi-cam | Documentary work |
| 4K H.265 + Effects | Occasional lag | Real-time playback | Commercial projects |
| After Effects Dynamic Link | Limited headroom | Optimal performance | Motion graphics |
| Multi-app workflow | Requires closing apps | All apps open | Fast turnaround |
Dual Monitor vs Ultrawide: Which Setup Boosts Timeline Efficiency?
In a small London studio, every square centimetre of desk space is prime real estate. The choice between a dual monitor setup and a single ultrawide monitor is therefore not just about preference; it’s a critical decision impacting ergonomics, workflow efficiency, and budget. There’s no single right answer, only the best answer for *your* specific needs. The core trade-off is between the seamless, uninterrupted horizontal space of an ultrawide and the versatile, compartmentalized layout of a dual-monitor configuration.
An ultrawide monitor is a timeline-centric editor’s dream. It allows you to see a vast stretch of your 4K sequence without constant horizontal scrolling, which is a significant time-saver. However, it can be less efficient for managing multiple distinct application windows, such as your NLE, a script, and your file browser. As research from display experts highlights, dual monitors excel for editors who need clear physical separation between tasks. A popular and space-efficient setup for freelancers is a primary landscape monitor for the timeline and a secondary monitor rotated vertically. This « L-configuration » is perfect for scripts, email, or keeping your media bins permanently in view.

As the image demonstrates, a vertical monitor can dramatically improve the use of limited desk width, a common constraint in London flats. For your £3k budget, the costs are surprisingly comparable. A good 34-inch ultrawide and two quality 27-inch 1440p monitors often fall into a similar price bracket. Your decision should be guided by a practical framework: measure your desk, consider your most common tasks, and factor in cable management. An ultrawide offers a cleaner setup with fewer cables, while a dual setup offers more modularity and the ability to upgrade one screen at a time to spread costs.
The Speaker Placement Error That Ruins Your Audio Mix on Other Devices
You’ve spent hours perfecting an audio mix on your near-field monitors, only for the client to report that the dialogue is buried when they listen on their laptop or phone. This common and frustrating problem often stems from a simple but critical error: incorrect speaker placement in an untreated room. In a typical London flat—often a Victorian conversion with solid brick walls and square dimensions—the acoustic environment is actively hostile to accurate sound mixing. These hard, parallel surfaces create standing waves and flutter echo, which can drastically misrepresent the bass and mid-range frequencies at your listening position.
The most common placement mistake is pushing speakers flat against the wall and too far apart. The goal is to form an equilateral triangle between your head and the two speakers. Each speaker’s tweeter should be at ear level, and they should be angled inward to point directly at your ears. This creates a focused « sweet spot » where you can hear the most accurate stereo image. To combat reflections from nearby walls, you don’t need to spend a fortune on full-room acoustic treatment. The strategic approach is to place budget acoustic foam panels at the first reflection points on the side walls. You can find these points by sitting in your mix position and having a friend slide a mirror along the walls; wherever you can see a speaker in the mirror is a first reflection point that needs a panel.
Even this basic treatment can dramatically improve the translatability of your mixes. It’s a low-cost, high-impact part of your studio build that ensures the audio you approve is what the client actually hears, regardless of their device. Neglecting audio is a common pitfall; one London industry report found that a majority of production companies report clients underestimate audio post-production requirements, making it a key area where a freelancer can demonstrate professionalism.
When to Upgrade Your GPU: Signs Your Graphics Card Is Bottlenecking Your Render
The Graphics Processing Unit (GPU) is the heart of a 4K editing rig, accelerating everything from timeline playback and effects rendering to final exports. When you’re on a tight budget, deciding where to invest in the GPU hierarchy is a major challenge. The most obvious sign of a GPU bottleneck is stuttering playback on timelines with GPU-accelerated effects (like Lumetri Color or Warp Stabilizer) applied. Another key indicator is seeing low CPU usage (e.g., under 50%) during an export, while your GPU is pegged at 100% utilization. This means your CPU is waiting for the GPU to finish its work.
For 4K workflows, VRAM (the GPU’s dedicated memory) is just as important as raw processing power. It’s where the GPU stores the image data it’s working on. Running out of VRAM forces the system to use slower system RAM, causing performance to plummet. While you can edit 4K with less, Adobe officially recommends a minimum of 4 GB or more of GPU VRAM for 4K editing. For any serious work involving multiple layers or effects, 8GB should be your absolute minimum target.

Within your sub-£3k total build, the GPU will likely command a £300-£450 slice of the budget. This puts you in a competitive bracket where you must weigh the value of new vs. used and VRAM vs. core speed. For example, a used RTX 3070 might offer better raw performance for DaVinci Resolve, while an RTX 3060 with 12GB of VRAM could be a smarter choice for heavily-layered effects work in Premiere Pro, despite being a « lower-tier » card.
This value analysis is crucial for a budget-conscious freelancer. The following table compares popular GPU options within your price range, helping you make a strategic compromise based on your primary software and workflow.
| GPU Model | VRAM | UK Price (New/Used) | 4K Performance | Best For |
|---|---|---|---|---|
| RTX 4060 | 8GB | £290 new | Good with proxies | Premiere Pro |
| RTX 3070 (Used) | 8GB | £350 from CEX | Better raw performance | DaVinci Resolve |
| RTX 3060 12GB | 12GB | £280 used | Best VRAM value | Heavy effects |
| RX 6700 XT | 12GB | £320 new | Strong alternative | OpenCL workflows |
Why a Bad Folder Structure Costs You 15% of Your Billable Hours?
A messy folder structure is more than an inconvenience; it’s a direct tax on your earnings. Industry experts estimate that creative professionals can waste up to 15% of their time searching for files. For a freelance editor, that’s 15% of your billable hours spent on non-billable, frustrating work. When a client asks for a minor change to a project from three months ago, you should be able to locate the project file, source media, and graphics in under a minute. If it takes you 30 minutes to hunt down missing assets and relink files, you’ve just lost money and appeared unprofessional.
Your file system is a core part of your « digital supply chain. » A standardized, templated folder structure is the single most effective way to eliminate this massive time-sink. This isn’t about personal preference; it’s about implementing a professional standard that works for every project, every time. London-based agencies like DCP Web emphasize this systematic organisation as a key differentiator, especially for high-volume work like professional YouTube production. As a freelancer, adopting this discipline elevates you to that same professional standard.
The principle is simple: create a master template folder that you duplicate for every new project. This ensures consistency and predictability. Your brain no longer has to remember where you saved the audio files for a specific project because they are always in the `04_Audio` folder. Version control for project files (e.g., `Project_v01`, `Project_v02`) becomes second nature, preventing catastrophic errors like overwriting a client-approved version.
Your Action Plan: Auditing Your Project Structure
- Points of contact: Start by listing all physical drives, network locations (NAS), and cloud storage where your project media is currently scattered.
- Collection: For a recent project, inventory the existing folder structure. Take note of inconsistent or vague names like « Footage New, » « Final Exports, » or « Audio Misc. »
- Coherence: Compare your current chaotic structure against a professional template (e.g., the `01_Source`, `02_Proxies`, `03_Project_Files` model). Identify the gaps and inconsistencies.
- Memorability & Logic: Review your file naming. Are you using clear versioning like `_v01`, `_v02`, `_FINAL` or resorting to `_final_final_USE-THIS-ONE`? This is a key indicator of workflow health.
- Integration Plan: Create a simple text file outlining your new standard folder template and naming convention. Commit to using it for all new projects and develop a plan to migrate high-priority old projects as needed.
Broadband or Leased Line: Is the Dedicated Speed Worth the Cost?
For a video editor, internet speed isn’t about how fast you can stream Netflix; it’s about how quickly you can move gigabytes of 4K footage. This is the final and often most painful bottleneck in your digital supply chain. In London, you’re faced with a wide array of choices, from standard consumer broadband to costly business-grade leased lines. For a freelancer on a £3k setup budget, a leased line is out of the question. The real decision is between different types of fibre broadband, and the single most important metric to look at is upload speed.
Most consumer broadband plans are asymmetrical, meaning they offer blazing-fast download speeds but a comparatively tiny upload speed (e.g., 900Mbps down, 50Mbps up). This is a disaster for a 4K workflow. Sending a 5-minute 4K ProRes file (approx. 25GB) to a client on a 50Mbps upload connection can take over an hour. That’s an hour where your primary business tool is tied up on a single task. The game-changer for London freelancers has been the rollout of providers offering symmetrical fibre, where upload speeds match download speeds.
With a 1Gbps symmetrical connection, that same 25GB file uploads in under 4 minutes. This transforms your workflow, enabling seamless collaboration on cloud platforms like Frame.io and rapid delivery of final files. Fortunately, London is one of the most competitive markets for these services, with providers like Hyperoptic and Community Fibre offering symmetrical gigabit plans for business at prices comparable to, or even cheaper than, the asymmetrical plans from larger incumbents.
Choosing your ISP is as important as choosing your GPU. It requires a specific, workflow-oriented analysis. The table below compares several London-based providers, focusing on the metrics that matter most to a video editor.
| Provider | Speed | Monthly Cost | Upload Speed | 4K Upload Time (5min) |
|---|---|---|---|---|
| Virgin Media Business | 1Gbps | £62 | 50 Mbps | ~35 minutes |
| BT Business | 900Mbps | £55 | 110 Mbps | ~16 minutes |
| Hyperoptic | 1Gbps | £35 | 1Gbps | ~2 minutes |
| Community Fibre | 1Gbps | £29 | 1Gbps | ~2 minutes |
Key Takeaways
- Invest in Ergonomics First: A refurbished, high-end ergonomic chair prevents RSI and pays for itself in extended, focused editing sessions. It’s a productivity multiplier.
- Match Hardware to Workflow: Don’t just buy the « best » components. Choose your GPU VRAM, RAM amount, and monitor setup based on the specific demands of your projects and software.
- Master Your Digital Supply Chain: A disciplined folder structure and a high-speed symmetrical internet connection are not luxuries; they are fundamental tools for eliminating wasted time and appearing professional.
Is Your Office Internet Fast Enough for 4K Cloud Editing Workflows?
You’ve built the perfect rig. Your chair is a dream, your monitors are calibrated, and your folders are pristine. But if your internet connection can’t handle the demands of a modern cloud-based workflow, your entire suite is operating at a fraction of its potential. The benchmark for reliable 4K collaboration is not just about raw speed, but about having enough headroom. For smooth 4K client review streaming and file transfers, an upload speed of 25 Mbps or more is the bare minimum, but for a professional workflow, this is far too low.
Even with a fast symmetrical fibre connection, you can optimize your process to save time and data. The key is to avoid moving full-resolution 4K files unless absolutely necessary. A proxy-first workflow is essential. By generating lightweight 1080p proxy files locally before you even think about uploading, you can share entire projects with collaborators in a fraction of the time. These smaller files are perfect for the offline edit and for client review platforms like Frame.io or Dropbox Replay, which are designed for commenting and approval cycles.
Your full-resolution 4K masters should only be uploaded at the very end of the process, ideally overnight. Automating these large uploads frees up your daytime bandwidth for more immediate tasks like client communication and creative work. For freelancers working with large local files, investing in a Network Attached Storage (NAS) system can also be a game-changer, allowing you to transfer files between local machines at 10Gbps speeds without touching your internet connection at all. These strategies turn your internet connection from a potential bottleneck into a powerful, efficient pipeline for your business.
Stop wrestling with a setup that works against you. Start by auditing your single biggest bottleneck today—whether it’s your chair, your folder structure, or your upload speed—and take the first step toward building a more efficient, profitable, and enjoyable home studio.